
Improper handling on the job site is the primary cause of premature composite insulator failure. A single instance of exceeding installation torque or dropping a unit can introduce micro-fractures into the fiberglass core that expand into brittle failures years down the line. This composite insulator operating guide focuses on preventing that damage before the hardware is even strung.
The IEEE 987 standard identifies the insulator core as a load-bearing assembly of resin and glass fibers, which relies on a perfect bond with the metal end fittings to maintain structural integrity. At RaxPower, we see that the field often overlooks how easily this interface is damaged during rigging. We outline the specific pre-installation inspection protocols, torque specifications, and storage methods that preserve this bond, along with the environmental stress indicators that signal real degradation.
You get a practical commissioning checklist that catches hidden defects before energization, ensuring your inventory withstands real-world grid conditions.
Setting Up and Commissioning Your Insulators
Proper commissioning is the critical bridge between factory quality and field performance. The majority of premature insulator failures originate not from material defects, but from installation-induced damage and improper handling during the setup phase.
Pre-installation Inspection and Handling Protocols
Before the insulator is hoisted to the crossarm, a visual audit is non-negotiable. Composite insulators are susceptible to damage long before they are energized. When receiving units, inspect the silicone rubber sheds for cuts, tears, or punctures that may have occurred during transit. Even minor damage to the housing can expose the fiberglass core rod to moisture ingress, compromising the unit’s integrity.
Handling requires a disciplined approach. Never drop insulators or strike them against hard surfaces. While the end fittings are sturdy, the core rod inside is designed for tensile strength, not impact resistance. When lifting, use synthetic slings around the body (if the design allows) or dedicated lifting eyes on the end fittings—never the shed spacing. We advise our clients to keep the original packaging intact until the moment of installation to prevent accidental nicks from tools or debris found at the worksite.
- Storage Integrity: Store units in their original crates, away from direct ground contact and chemical contaminants like fuel or oil.
- Visual Defect Hunt: Look for “blooming” or chalking on the housing, which indicates UV aging if the stock was stored outdoors for extended periods.
- Interface Check: Ensure the end crimp zones show no signs of corrosion or separation from the rubber sheath.
Torque Specifications and Tensioning Limits
Over-tightening is a silent killer of composite insulators. Unlike porcelain, which is rigid, the interface between the metal end fitting and the rubber housing relies on a precise compression seal. Exceeding the recommended torque values can crush this seal or induce micro-cracks in the core rod. In our experience reviewing field failures, we frequently see evidence of excessive bolt torque at the attachment points, which creates point-loading stress that propagates over time.
Always refer to the specific manufacturer’s torque chart for the ball, socket, or tongue connections. Generally, you should use a calibrated torque wrench rather than an impact driver. For suspension sets, ensure that the clevis is properly aligned before tensioning; side-loading during the tightening process places unnecessary bending stress on the end fitting. The goal is a secure mechanical lock that maintains the electrical seal without deforming the insulator’s structural components.
Never use a pipe extension on a wrench to “tighten it just a bit more.” This brute-force method easily exceeds the yield strength of the galvanized steel hardware and can permanently damage the insulator’s core rod integrity.
Avoiding Mechanical Stress During Rigging
The physics of composite insulators demands respect during the stringing process. While they boast high tensile strength (often 70kN to 160kN+ depending on the rating), they have lower resistance to bending and cantilever forces compared to steel arms. When rigging for tensioning, avoid sharp bends in the conductor that transfer excessive force back onto the insulator string.
Do not use the insulator as a handling lever to lift or position the conductor. If running travelers (rolling blocks) must be used, ensure they are sized correctly to prevent the conductor from jumping out and striking the insulator sheds. We have observed that dynamic shocks during sagging operations—caused by sudden releases of tension—are a primary cause of hidden core rod damage. Control the tensioning speed and utilize dampeners or buffer springs to minimize shock loads on the string.
Commissioning Verification Checklist
Once the insulator is installed and the conductor is sagged, a final verification loop is required before energization. This is not just a visual check; it is a confirmation of proper integration with the line hardware. Walk the line and verify that the ball and socket connections have rotated freely to accommodate the angle of the conductor. If a connection is “locked up” or misaligned, it indicates a installation error that must be corrected.
Check the grading rings (corona rings) if the insulator is equipped with them. They must be centered and rigidly fixed. A loose ring can vibrate and erode the housing, causing tracking failures. Finally, verify that all cotter keys or R-clips are properly spread and locked. A missing clip in a high-vibration environment is a guaranteed failure point.
📋 Final Field Verification
- Step 1: Verify that all hardware interfaces (yoke plates, suspension clamps) sit flush against the insulator end fittings without gaps.
- Step 2: Inspect the area around the end fittings for any signs of rubber separation or “popping” out of the crimp zone.
- Step 3: Confirm that the conductor is not exerting torsional (twisting) force on the insulator string, which can unscrew connections over time.
- Step 4: Check for proper clearance between the insulator body and the tower structure to prevent electrical arcing during swing conditions.
| Commissioning Phase | Rax Power Specification | Verification Action | Engineering Benefit |
|---|---|---|---|
| Visual & Coating Inspection | ISO 1461 Hot-Dip Galvanizing (>85 microns) | Coating thickness gauge test | Ensures smooth, bright finish and long-term corrosion resistance |
| Dimensional Compatibility | IEC 61284 Standards | Gauge testing for fitment | Guarantees precise integration with existing line hardware |
| Structural Integrity Check | Hot-Forged Hardware Technology | Visual inspection for casting voids (absence thereof) | Provides superior strength and ductility compared to traditional casting |
| Mechanical Load Verification | Rigorous In-house Load Testing | Review of load test certificates | Validates high-breaking load capacity for utility safety |
| Quality Assurance Audit | 100% Double-Review Process by Dedicated QC Team | Check for SGS verification marks | Ensures zero-defect delivery and compliance with global standards |
Handling Environmental Stress and Mechanical Loads
Composite insulators are engineered to simultaneously resist UV degradation, pollution buildup, and high mechanical tension — making them a preferred solution for harsh outdoor environments where ceramic alternatives degrade faster.
UV Resistance and Polymer Housing Performance
The silicone rubber housing on composite insulators is specifically formulated to withstand prolonged UV exposure without cracking, chalking, or losing hydrophobicity. Unlike porcelain or glass, the polymer sheath does not degrade under direct sunlight, which is critical for installations in high-UV regions such as equatorial and desert climates.
The housing also acts as a sealed barrier around the fiberglass core rod, preventing moisture ingress and protecting the structural element from environmental corrosion. This dual-function design — environmental sealing plus mechanical strength — is what distinguishes composite insulators from traditional materials.
Pollution and Hydrophobicity Retention
In industrial or coastal areas, pollution and salt fog accelerate surface tracking and leakage current on insulators. Composite insulators with silicone rubber housing maintain hydrophobicity — the ability to repel water — even after years of exposure to contaminant deposits.
This property significantly reduces the risk of flashover under polluted conditions, lowering maintenance frequency and extending service intervals. For utility operators in high-pollution zones, this translates directly into reduced operational expenditure and fewer unplanned outages.
Mechanical Load Capacity and Core Design
The mechanical strength of a composite insulator is determined primarily by its fiberglass core rod. Standard suspension composite insulators are rated at mechanical strengths such as 70 kN, with higher-rated variants available for extreme wind, ice, or span-length conditions.
- Standard mechanical rating: 70 kN for typical suspension applications in moderate climates.
- High-stress environments: Insulators with increased core diameter and reinforced end fittings are specified for high wind speeds, heavy ice loads, or long-span crossings.
- Core protection: The polymer housing fully encloses the core rod, preventing mechanical damage from abrasion and environmental wear that can compromise bare metal or ceramic components.
When selecting an insulator for a specific site, the mechanical load rating must be matched to the expected tension from conductor weight, wind pressure, and ice accumulation. Underspecifying the mechanical rating is one of the most common field errors that leads to premature failure.
Combined Stress: When Environment and Load Interact
The real challenge in field deployment is not UV or mechanical load in isolation — it is their combined effect. A composite insulator exposed to heavy pollution and high mechanical tension simultaneously places greater stress on both the housing surface and the core rod.
Proper selection requires evaluating the site’s pollution severity level (per IEC 60815) alongside the mechanical load profile. Insulators deployed in coastal or industrial zones should prioritize housing formulations with enhanced hydrophobicity recovery and contamination shedding performance, while those in high-wind or heavy-ice regions must meet or exceed the calculated mechanical load with an appropriate safety margin.
Scheduling Regular Inspections and Maintenance
A robust maintenance schedule hinges on three intervals: visual inspections every 12–24 months, hydrophobicity assessments every 2–3 years, and biennial checks on metal hardware. This cadence ensures early detection of seal degradation or housing loss before mechanical or electrical failure occurs.
Visual Inspection Protocols and Cadence
Visual inspection remains the primary defense against premature composite insulator failure. Unlike ceramic units, composite insulators do not show catastrophic shattering, but rather exhibit gradual degradation of the silicone rubber housing. For standard transmission lines, operators should schedule visual patrols every 12 to 24 months. However, in high-pollution or coastal environments where salt and industrial contaminants accelerate aging, this frequency should increase to every 6 to 12 months.
Inspectors do not require heavy instrumentation for the initial pass; high-resolution binoculars or drones are sufficient for identifying macro-level defects. The objective is to identify physical breaches in the housing that could expose the Fiber Reinforced Plastic (FRP) core to environmental stress.
- Housing Damage: Look for cuts, abrasions, or “puncture” marks on the sheds, often caused by bird pecking or throwing debris. Even small cuts can expose the core rod to moisture ingress.
- Erosion and Tracking: Check for signs of dry-band arcing, which manifests as chalking, whitish tracks, or deep erosion on the shed surface, particularly near the high-voltage end.
- Core Rod Exposure: Inspect the interface between the rubber and the end fittings. Any visible separation (debonding) or exposed rod indicates a critical failure risk requiring immediate replacement.
Hydrophobicity Assessment (IEC 62073)
The defining operational characteristic of composite insulators is hydrophobicity—the ability of the silicone rubber to repel water. This property prevents the formation of continuous conductive water films, thereby inhibiting pollution flashover. Unlike ceramics, composite materials possess hydrophobicity migration, where the low-molecular-weight silicone chains transfer over contaminant layers to maintain water repellency.
To verify this performance, maintenance schedules must include hydrophobicity assessments every 2 to 3 years, or immediately after major pollution events. The industry standard for this evaluation is the water spray method classified under IEC 62073. This test categorizes the surface wettability into seven classes (HC1 to HC7):
- HC1 to HC2: Discrete water droplets form and roll off easily. The insulator is in optimal condition with no loss of hydrophobicity.
- HC3 to HC4: Wetted regions form only as distinct trails. Partial recovery is usually occurring, but the insulator should be monitored closely.
- HC5 to HC7: Continuous water films form (hydrophilic). This indicates a permanent loss of hydrophobicity, often due to severe aging, arcing, or material degradation. Units in this range have a significantly reduced probability of withstanding pollution flashover and should be flagged for diagnostic testing or replacement.
Metal Accessories and Corrosion Control
While the polymeric housing manages electrical insulation, the galvanized steel end fittings bear the mechanical load. Corrosion of these accessories can compromise the crimping integrity and the overall mechanical strength of the assembly. Scheduling maintenance for metal components is distinct from the housing and typically requires intervention every 2 years.
Operators must verify the integrity of the zinc galvanizing layer. If white rust (zinc oxide) or red rust (iron oxide) is observed, the protective coating has failed. Standard maintenance protocol dictates treating these areas with zinc-rich paint or approved anti-corrosion compounds to restore the barrier against environmental elements.
The interface between the end fitting and the silicone rubber is a critical vulnerability. Poor sealing allows moisture to penetrate the core rod, leading to brittle fracture and electrical failure. During scheduled maintenance, strictly inspect the “seal line” for any gaps, cracking, or signs of electrolytic corrosion tracks exiting the hardware.
Common Failures and How to Prevent Them
Composite insulator failures are rarely sudden — they are progressive. Environmental stress cracking, sheath abrasion, and hydrophobicity loss account for the majority of field defects. Prevention hinges on material selection, proper handling, and early detection before degradation reaches critical thresholds.
Environmental Stress Cracking (ESC)
Environmental stress cracking is the most pervasive failure mode in composite insulators, particularly in industrial and coastal environments. It occurs when the silicone rubber housing is simultaneously subjected to mechanical tension and aggressive chemical agents — including sulfur compounds, silicones, and certain cleaning solvents. The cracking typically initiates at the stress concentration points near the end fittings and propagates inward along the sheath surface.
The process is insidious. Micro-cracks form on the housing surface that are invisible to the naked eye during routine visual inspection. Over months or years, these cracks deepen as UV radiation and moisture accelerate polymer degradation. Once the cracks penetrate past the sheath thickness, water tracking channels form along the fiberglass core rod, leading to core rod degradation and eventual mechanical failure under line tension.
- Root cause: Combined exposure to tensile stress (from conductor weight and wind loading) and environmental contaminants that attack the silicone rubber polymer matrix.
- High-risk zones: Regions within 100–150mm of the metal end fittings where mechanical stress concentrates, and areas exposed to direct industrial pollution or salt spray.
- Prevention: Specify insulators with ESC-resistant silicone rubber compounds formulated for the target environment. In severe pollution or coastal zones, select housings with enhanced cross-linking density and higher filler loading.
- Prevention: Ensure proper handling during transport and installation — avoid creating localized stress points by dragging or dropping insulators onto hard surfaces.
Do not assume all silicone rubber housings are equally resistant to ESC. Standard-grade compounds may develop visible cracking within 3–5 years in heavy pollution zones. Always request the manufacturer’s ESC test data per IEC 61109-3 supplementary tests before procurement.
Sheath Abrasion and Mechanical Damage
Sheath abrasion is a leading cause of premature composite insulator failure, particularly in high-vibration zones and during installation. The silicone rubber housing, while flexible, has limited resistance to repeated friction against hardware, conductor strands, or supporting structures. Even minor surface scoring compromises the hydrophobic barrier and creates nucleation sites for tracking.
The most common abrasion scenarios involve three distinct mechanisms. First, wind-induced conductor swing causes repeated rubbing between the insulator housing and nearby metal hardware such as vibration dampers or spacer bars. Second, improper handling during installation — dragging the insulator across gravel, concrete, or rough packaging materials — creates surface gouges that become failure initiation points. Third, bird activity and branch contact in rural or forested corridors produce localized wear patterns that degrade the sheath over time.
- Installation-phase abrasion: Avoid sliding insulators across any surface. Use proper lifting slings and guide ropes. Never drag the housing end-first across the ground during positioning.
- Operating-phase abrasion: Maintain minimum clearance distances between the insulator and adjacent hardware. Use protective sleeves or rubber padding at contact points where wind-induced movement is expected.
- Inspection marker: Sheath abrasion is identifiable by parallel scoring marks, material displacement, or exposed core rod. Any abrasion deeper than 1mm of the sheath thickness requires documented assessment and likely replacement.
Hydrophobicity Loss and Surface Tracking
The hydrophobicity of the silicone rubber housing is the primary defense against surface leakage current and tracking. When hydrophobicity degrades — due to UV exposure, contamination buildup, or electrical arcing — the surface becomes conductive under wet conditions. This allows leakage current to flow across the housing, generating heat that further accelerates polymer degradation and creates carbonized tracking channels.
Hydrophobicity recovery is a defining advantage of silicone rubber over porcelain or glass. Minor contamination deposits do not permanently destroy hydrophobicity — the silicone matrix allows low-molecular-weight chains to migrate to the surface and restore water repellency after rain or dew events. However, once the hydrophobicity classification drops below Grade 4 (per IEC 62217-2), the insulator’s flashover voltage under wet conditions degrades significantly, and the risk of sustained arcing increases.
- Monitoring method: Conduct hydrophobicity classification tests at commissioning and during routine inspections. A drop from Grade 1 (fresh) to Grade 6 (lost) indicates critical degradation requiring immediate replacement.
- Contamination management: In industrial or agricultural areas with heavy pollutant deposition, increase inspection frequency. Salt deposits, conductive dust, and bird droppings accelerate hydrophobicity loss.
- Flashover prevention: Maintain adequate creepage distance for the pollution severity class. Under IEC 60815 classification, heavily polluted areas (Class IV) require creepage ratios of at least 35mm/kV for composite insulators.
End-Fitting Corrosion and Pull-Out
End-fitting failures represent a critical safety concern because they involve the mechanical integrity of the entire insulator assembly. Corrosion of galvanized steel fittings and core rod pull-out from the metal grouting sleeve are the two dominant failure mechanisms in this category.
Galvanized steel end fittings rely on a continuous zinc coating to protect against atmospheric and soil corrosion. When the coating is damaged during handling or when the insulator is installed in aggressive environments — such as marine atmospheres with chloride exposure or agricultural zones with ammonia contamination — localized corrosion pits form. Over time, these pits reduce the cross-sectional area of the fitting, creating stress concentration points that can lead to brittle fracture under load.
Core rod pull-out occurs when the grouting compound between the fiberglass rod and the metal fitting degrades or loses adhesion. This is most commonly caused by moisture ingress through sheath damage at the fitting interface, thermal cycling that creates micro-gaps in the grout, or inadequate surface preparation of the core rod before grouting during manufacturing.
- Corrosion prevention: Specify hot-dip galvanized fittings with a minimum coating thickness of 85 microns per ISO 1461. In marine or highly corrosive environments, consider stainless steel fittings or fittings with additional polymer coating.
- Pull-out prevention: Verify that the grouting process uses epoxy or polyurethane compounds designed for fiberglass-to-metal bonding. Request pull-out test certificates per IEC 61109 mechanical load requirements.
- Field inspection: Check for white zinc corrosion products, visible rust staining, or green patina on fittings. Any fitting showing active corrosion beyond surface patina should be flagged for replacement.
Internal Moisture Ingress and Core Rod Degradation
The fiberglass-reinforced polymer (FRP) core rod is the structural backbone of a composite insulator. Its tensile strength — typically exceeding 1,200 MPa — is what allows composite insulators to replace much heavier metal hardware. However, this core is vulnerable to moisture ingress, which causes progressive degradation of the glass fibers through static fatigue.
Moisture enters the core through two primary pathways. The first is through damaged or cracked housing at the end-fitting interfaces, where the seal between the silicone sheath and the metal fitting has failed. The second is through permeation across the housing material itself — a slow process that accelerates significantly at elevated temperatures and high humidity.
Once moisture reaches the glass fibers, it initiates stress corrosion cracking at the fiber surface. This is a time-dependent process. Under sustained mechanical load and in the presence of water, the critical stress intensity factor for glass fibers decreases, causing cracks to propagate at stresses well below the short-term breaking load. Field failures from core degradation typically occur 8–15 years after installation in harsh environments, though this varies significantly with housing quality and environmental severity.
- Detection: Perform live-line insulator resistance testing at routine inspection intervals. A significant drop in dry-bushing resistance (below 1 GΩ for distribution-class insulators) indicates moisture ingress and requires immediate investigation.
- Prevention: Ensure end-fitting seals are intact during installation. Use torque-controlled tools when tightening compression fittings to avoid deforming the housing seal surface.
- Prevention: Specify insulators with hermetically sealed end-fitting designs that incorporate multiple sealing interfaces — typically an O-ring or compression seal at the metal-to-sheath interface.
When evaluating composite insulator specifications, prioritize the ESC resistance rating and the end-fitting seal design over the headline tensile strength. A 1,400 MPa core rod is irrelevant if the housing cracks within 5 years in your operating environment. Request the full test report including IEC 61109 environmental conditioning tests, not just the mechanical performance summary.
Flashover and Polarity-Induced Degradation
Flashover events on composite insulators differ fundamentally from porcelain insulators. When a flashover occurs on a composite insulator, the resulting arc tracks along the silicone rubber housing surface, carbonizing the material in the arc path. Unlike porcelain, where the glaze is inert and can often survive a flashover event, the carbonized track on silicone rubber creates a permanent conductive path that cannot self-recover.
Polarity-induced degradation is a specific failure mechanism relevant to HVDC applications. Under DC voltage stress, space charges accumulate on the insulator surface, creating non-uniform electric field distribution. This concentrates the electrical stress at specific points along the housing, accelerating surface aging and promoting premature tracking compared to AC applications at the same voltage level.
- Post-flashover assessment: Any composite insulator that has experienced a flashover must be removed from service and subjected to full diagnostic testing — including resistance measurement, hydrophobicity classification, and visual inspection of the entire housing length. Do not return a flashed-over insulator to service based on visual appearance alone.
- HVDC-specific design: For DC applications, specify insulators with increased creepage distance (typically 20–30% more than equivalent AC installations) and housing compounds with enhanced tracking resistance (PTI voltage exceeding 400V per IEC 60587).
- Arc resistance: Verify the manufacturer’s short-term arc resistance data. Housing compounds with higher fillers content (alumina trihydrate) char more slowly and maintain structural integrity longer during arcing events.
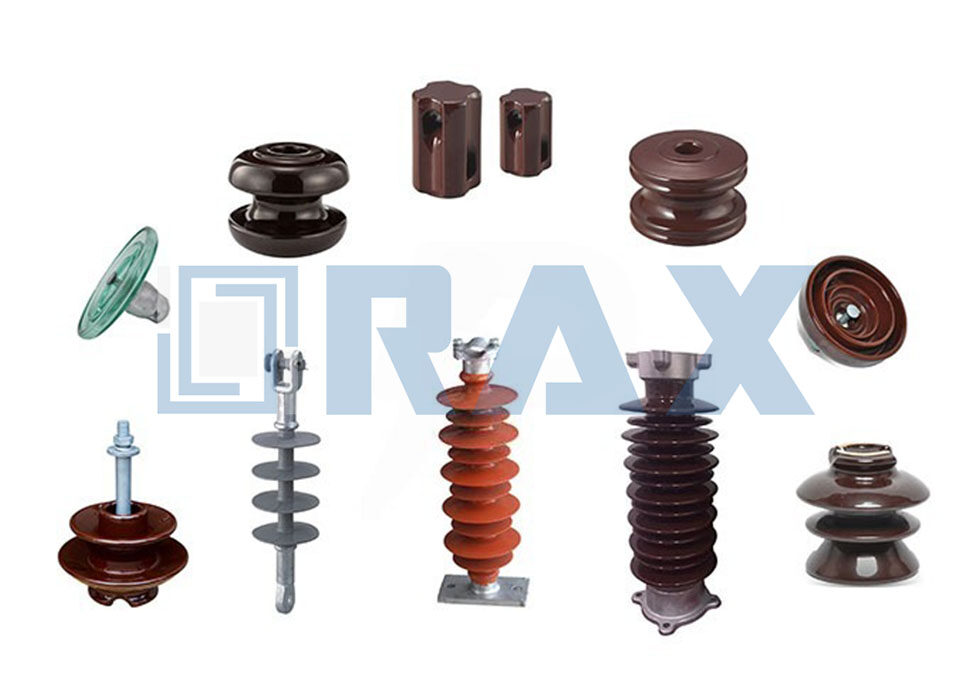
Detecting Hidden Fractures in HV Insulators
Hidden fractures in composite insulators—specifically Stress Corrosion Cracking (SCC) of the core rod—can remain undetected by visual inspection, posing a critical risk of sudden line drop. Reliable detection requires moving beyond surface checks to analyze thermal and electrical field anomalies.
The Challenge of “Brittle Fracture” in Composite Insulators
Unlike ceramic or glass units that shatter visibly, composite insulators are prone to a specific failure mode known as “brittle fracture.” This occurs when the fiber-reinforced polymer (FRP) core rod is exposed to acid—typically generated by electrical corona discharges or moisture ingress at the end fittings. The acid attacks the glass fibers, causing micro-cracks that propagate perpendicular to the axis.
The primary operational hazard is that the silicone rubber housing often retains its structural integrity and shape even after the core has completely snapped. The insulator may physically hang on the line under compression, appearing functional to a ground crew, but will fail immediately under mechanical load (such as wind or ice) or during live-line maintenance work.
Advanced Detection Methodologies
Because visual inspection is insufficient for identifying internal core degradation, utility engineers must deploy non-destructive testing (NDT) methods. These techniques focus on the physical side-effects of a fracture, such as changes in electrical resistance or thermal profiles.
- Infrared Thermography (IRT): When a core rod fractures or suffers severe internal degradation, the impedance at the break point increases. Under load, this area generates heat due to dielectric losses. An IRT camera can detect a “hot spot” typically ranging from 1°C to 5°C above the ambient temperature of the insulator housing. Operators should differentiate between stable hot spots (indicating internal damage) and moving hot spots (often caused by dry band arcing on the surface).
- Electric Field Distribution Method: An intact composite insulator has a predictable capacitive and resistive field distribution along its length. A hidden fracture drastically alters this profile. Using specialized portable electric field meters, technicians can measure the field intensity at various points. A significant spike or irregularity in the field curve near the hardware or mid-span strongly suggests an internal core break or interface separation.
- Ultrasonic Testing: While less common for transmission lines due to access difficulties, ultrasonic testing is highly effective for substation posts. High-frequency sound waves are transmitted into the hardware; reflections (echoes) indicate internal voids, cracks in the crimped area, or debonding between the rod and the end fitting.
Relying solely on UV (corona) cameras can yield false positives. While corona activity often precedes acid erosion, not all corona leads to immediate fracture, and some fractures exist without significant external corona. Always cross-reference UV detection with thermal or mechanical assessments.
Visual “Red Flags” for Internal Failure
While internal breaks are invisible, they eventually manifest in the physical geometry of the insulator. When inspecting lines, technicians should look for mechanical deformations that indicate the core rod has lost its tensile continuity.
- The “Banana” Effect: If the core rod snaps but the housing remains intact, the insulator may bow or droop significantly under its own weight. This curvature is often visible from the ground, appearing as a distinct arc or “banana” shape rather than a straight line.
- Hardware Rotation: In suspension strings, a core break can release torsional stress stored in the insulator, causing the conductor attachment point to rotate or twist unusually relative to the tower arm.
- End Fitting Separation: While often caused by overloading, a gap appearing between the metal end fitting and the rubber shed (the “interface”) can allow moisture ingress, accelerating the hidden corrosion process. Any noticeable recession of the housing into the hardware warrants immediate diagnostic testing.
Decision Matrix for Field Suspicions
When an anomaly is detected, the decision to replace or monitor must be driven by the voltage class and load criticality. For transmission lines exceeding 230kV, the risk of cascading failure from a single insulator drop necessitates a “zero-tolerance” policy for thermal or field anomalies. In distribution networks (e.g., 33kV), operators may prioritize immediate replacement if the insulator shows a combination of thermal hotspots and mechanical drooping, as these confirm a completed core fracture rather than just aging.
Deciding When to Replace Your Insulators
Replacing composite insulators on a schedule rather than waiting for failure requires a systematic blend of field diagnostics, visual assessment, and environmental exposure modeling — not guesswork.
Field Diagnostic Testing Methods and Thresholds
Composite insulators are not maintenance-free in the sense that they require zero assessment. The real question for utility engineers is which diagnostic tests actually predict failure, and at what thresholds action becomes mandatory rather than optional.
The most widely adopted field test is the contact resistance test, also known as the insulation resistance test. This method measures the resistance across the FRP core rod using a high-voltage megohmmeter. A reading below 1,000 megohms on a distribution-class insulator or below 10,000 megohms on a transmission-class unit typically signals internal moisture ingress or core degradation. Utilities running these tests in-field consistently find that insulators with readings trending downward over two consecutive inspections are far more likely to fail within the next 12 to 18 months than those maintaining stable values.
Quantifying the water-repellent properties of silicone rubber housing is essential for predicting electrical performance. The spray test method, standardized under IEC 62217-2, assigns a Hydrophobicity Class (Hc) from Hc1 to Hc7. An Hc1 or Hc2 rating — where water forms continuous films across the housing surface — is a strong indicator that the silicone rubber has lost its ability to repel moisture. When this occurs alongside visible surface erosion, the risk of dry-band arcing and subsequent tracking increases significantly. In our experience working with transmission operators across Southeast Asia and South America, we see Hc6 or Hc7 conditions on insulators that are only 3 to 5 years old in high-pollution corridors, which is why we engineer our silicone formulations specifically to resist hydrophobicity loss under these conditions.
Partial discharge (PD) testing using ultrasonic or electromagnetic sensors provides another layer of diagnostic clarity. While PD activity can occur on healthy insulators under wet conditions, persistent readings above 10 picocoulombs under dry conditions during routine surveys warrant immediate investigation. PD signatures that correlate with mechanical load points — particularly near the end fittings — often point to interfacial debonding rather than surface contamination alone.
Visual Degradation Indicators and Assessment Criteria
Visual inspection remains the first and most cost-effective diagnostic tool in any asset management program. However, the challenge for field crews is distinguishing between cosmetic wear that is normal for the service environment and degradation that indicates impending structural failure. The key is understanding what specific visual signs correlate with which failure modes.
Tracking the lifecycle of polymer housing degradation reveals a predictable pattern. Early-stage exposure produces a chalky surface appearance known as surface hardening or chalking, which is primarily cosmetic and does not compromise electrical performance. As exposure intensifies, the housing develops corona cuts — small radial incisions near the sheds — and the hydrophobic layer begins to thin. When erosion progresses to the point where the underlying fiberglass reinforcement becomes visible, the insulator has entered an advanced degradation phase that requires replacement rather than remediation.
Fitting corrosion is another visual indicator that demands attention. While hot-dip galvanizing provides substantial protection, the area immediately adjacent to the crimped fitting — where the silicone housing meets the metal — is a vulnerable zone. Red rust formation on end fittings, especially when accompanied by visible loosening or movement, indicates that the corrosion barrier has been compromised and the mechanical integrity of the connection is at risk.
The most visually deceptive degradation occurs at the housing-to-core interface. Interfacial debonding — the separation between the silicone rubber and the FRP core — often produces no external warning signs until moisture has already penetrated and accelerated internal corrosion. Operators should look for circumferential gaps near the fitting ends, bulging or distortion of the housing, and any evidence of water pooling at the base of the sheds. These are not signs that can be monitored over time; they are indicators that the insulator should be removed from service immediately.
When assessing visual degradation, always inspect the insulator from multiple angles under direct sunlight rather than shadow. Corona cuts and early-stage tracking channels are nearly invisible in low-light conditions but become clearly apparent under direct illumination. This simple practice has prevented numerous unexpected failures in our client networks.
Service Life Estimation Based on Environmental Exposure
Predicting the remaining service life of a composite insulator is not a matter of applying a single formula to a calendar date. It requires an understanding of how the specific environmental conditions at each installation point accelerate different degradation mechanisms at different rates.
The baseline service life for a well-manufactured composite insulator in a moderate environment — low pollution, moderate UV exposure, and neutral temperature ranges — typically ranges from 25 to 30 years. This baseline shifts significantly based on three primary environmental factors: pollution severity, UV intensity, and mechanical loading conditions.
In high-pollution environments, such as coastal regions with salt deposition or industrial zones with acidic particulate matter, the silicone rubber housing degrades faster and the risk of surface tracking increases. Utilities in these environments should plan for insulator replacement between 15 and 20 years rather than the baseline 25 to 30. The acidic environment accelerates both surface erosion and the risk of core rod stress corrosion, which is why we develop our silicone compounds with enhanced resistance profiles for these specific market conditions.
High-UV environments, particularly at elevation or in equatorial regions, accelerate silicone rubber hardening and cracking. The UV radiation breaks down the silicone polymer chains over time, reducing elasticity and making the housing more susceptible to corona erosion. In these conditions, service life may be reduced by 20 to 30 percent compared to moderate environments.
Mechanical loading conditions also play a crucial role. Insulators operating at sustained tension levels above 70 percent of their rated mechanical load — a common scenario in guyed span configurations or areas with significant ice loading — experience accelerated fatigue in both the core rod and the end-fitting connections. These installations should be evaluated every 5 years rather than the standard 10-year interval.
Elevated mechanical loading under these conditions accelerates degradation, necessitating a formal assessment to determine when replacement is warranted.
Prolonged exposure to such high mechanical stress accelerates degradation, making it essential to evaluate whether an insulator’s remaining service life justifies continued operation. When mechanical and environmental factors converge to compromise insulator integrity, the question shifts from condition assessment to replacement strategy. This is where structured justification documentation becomes critical for informed decision-making.
When mechanical loading conditions push insulators into these high-stress regimes, the cumulative damage accelerates degradation and narrows the window for proactive intervention. This reality forces asset managers to weigh technical risk against operational and financial consequences, ultimately shaping how replacement decisions are justified and documented.
Accurately quantifying these physical limits allows engineers to predict remaining service life. This technical assessment serves as the essential foundation for the formal business case required to authorize replacements.
Justification Documentation for Replacement Decisions
For utility procurement and asset management teams, the decision to replace insulators is not merely a technical judgment — it is a financial and compliance decision that requires documented justification. A well-structured replacement justification package protects the utility from audit findings, supports budget approval processes, and creates a defensible record for regulatory bodies.
The documentation should begin with a clear statement of the insulator’s installation date, original specifications, and the environmental conditions at the installation point. This establishes the baseline against which all subsequent assessments are measured. Without this context, diagnostic test results lack the framework needed for meaningful interpretation.
Next, the justification must include all field diagnostic test results with dates, test methods used, and the specific thresholds against which the results were evaluated. A single test result is less compelling than a trend analysis. Utilities that maintain a database of diagnostic results across multiple inspection cycles can demonstrate a clear degradation trajectory, which carries significantly more weight in budget approval processes than a single snapshot measurement.
Visual inspection photographs are an essential component of the documentation package. These should include wide-angle shots showing the insulator in its installed position, close-up shots of any degradation indicators, and comparative photographs against reference standards when available. Photographs with date stamps and location identifiers provide irrefutable evidence of condition.
Finally, the justification should include a risk assessment that quantifies the consequence of failure. This is not about fear-based arguments — it is about presenting the utility’s leadership with a clear comparison between the cost of proactive replacement and the potential cost of an unexpected failure. A single composite insulator failure on a critical transmission span can result in service outages, emergency repair mobilization, and reputational damage that far exceed the cost of scheduled replacement. Our engineering team routinely provides this type of risk-cost analysis for our utility clients, and the data consistently shows that planned replacement programs deliver a return on investment that exceeds 5:1 when compared to emergency replacement scenarios.
📋 Replacement Justification Documentation Checklist
- Step 1: Record installation date, original specifications, and environmental classification for each insulator unit.
- Step 2: Document all diagnostic test results with dates, methods, and threshold comparisons. Include trend data where available.
- Step 3: Capture dated and geotagged photographs of visual degradation indicators.
- Step 4: Perform a risk-cost analysis comparing proactive replacement expense against potential failure consequences.
- Step 5: Compile all documentation into a standardized report format aligned with your utility’s asset management procedures.
Do not rely solely on visual inspection when making replacement decisions for insulators installed in high-stress environments. The most dangerous failure mode — interfacial debonding leading to core rod corrosion — often presents minimal external signs until the insulator is critically compromised. Always combine visual assessment with contact resistance and partial discharge testing for a complete picture.
Frequently Asked Questions
How often should composite insulators be diagnostically tested in the field?
In moderate environments, a 10-year interval between diagnostic tests is standard. In high-pollution, high-UV, or high-mechanical-load environments, testing should occur every 5 years. Any insulator showing degraded test results should be re-tested at 12-month intervals until a replacement decision is made.
Can hydrophobicity be restored on aging composite insulators?
Temporary hydrophobicity restoration is possible using specialized spray-on coatings, but this is a short-term mitigation measure, not a solution. When the silicone rubber housing has progressed beyond Hc4 hydrophobicity class and shows visible erosion or corona cuts, the only reliable remedy is replacement. Coating applications on severely degraded housing often fail within 12 to 18 months.
What is the single most reliable indicator that a composite insulator needs immediate replacement?
A contact resistance reading below the threshold values (1,000 MΩ for distribution, 10,000 MΩ for transmission) combined with visible interfacial debonding signs is the most reliable indicator of imminent failure. This combination suggests that moisture has penetrated the housing-to-core interface and the FRP core is actively degrading under mechanical load.
Should insulators from different manufacturers be mixed on the same span?
Mixing insulators from different manufacturers on the same span is not recommended. Differences in housing material formulations, hydrophobicity retention characteristics, and mechanical load distribution can create uneven stress patterns. When replacing insulators, it is best practice to use units from the same manufacturer and product line to ensure consistent aging behavior across the span.
| Failure Indicator | Critical Signs | Risk Assessment | Rax Quality Standard |
|---|---|---|---|
| Core Rod Fracture | Sudden brittle fracture, decay-like cracking, acid exposure | Critical – Unpredictable catastrophic failure | High-strength materials resistant to stress corrosion |
| Silicone Housing Erosion | Loss of hydrophobicity, corona cuts, chalking, shed damage | High – Leads to flashovers and tracking | UV and corona resistant silicone formulations |
| Interfacial Debonding | Separation between core and housing, moisture ingress | High – Accelerates internal core corrosion | 100% double-review process by dedicated QC team |
| Fitting Corrosion | Red rust on end fittings, loose connections | Medium – Compromises mechanical load bearing | ISO 1461 hot-dip galvanizing (>85 microns) |
| Mechanical Overload | Permanent deformation, exceeding tension limits | Critical – Immediate structural collapse risk | Rigorous load testing per IEC 61284 standards |
Conclusion
Composite insulators demand a different mindset than ceramic. The silicon rubber housing protects itself — your job is protecting the unit from mechanical abuse during rigging and ensuring the end fittings are torqued to spec. Most field failures trace back to one mistake: overtightening the hardware or dropping a stress limit during stringing. Once you nail the installation protocol, these units run for decades with minimal upkeep. Our engineering team has spent years troubleshooting the exact failures you’ll see in the field, and the pattern is always the same — skip the pre-installation inspection, pay the price later.
- Verify torque values match the manufacturer’s datasheet before tensioning
- Conduct visual inspections for housing cuts, core rod exposure, and fitting corrosion on every unit
- Document environmental exposure conditions to forecast replacement timelines accurately
- Reach out to our engineering team with technical questions about installation procedures or material specifications — no purchase required
Frequently Asked Questions
Can hydrophobicity recover after prolonged contamination?
Yes, silicone rubber exhibits a natural hydrophobicity recovery mechanism where methyl groups migrate to the surface after contamination is removed. However, severe or prolonged corona discharge can cause permanent erosion that destroys this self-recovery capability. Once the silicone rubber surface is significantly eroded or carbonized, hydrophobicity recovery becomes unreliable and insulator performance may be permanently compromised.
How does corona-induced silicone rubber erosion develop?
Corona discharge gradually erodes silicone rubber surface material through repeated electrical discharge energy exposure. The erosion process begins with surface discoloration and progresses to visible tracking and material loss. Severe erosion compromises the insulating barrier and can expose the FRP core rod to environmental moisture, accelerating further degradation and potentially leading to catastrophic failure.
Why is FRP core quality critical for insulator longevity?
The FRP core rod provides the primary mechanical strength of the composite insulator and must withstand continuous tensile loading throughout its service life. High-quality FRP cores with proper resin formulation and fiber alignment resist moisture penetration and stress corrosion cracking. Inferior core materials may appear adequate initially but can suffer sudden brittle fracture after years of service under combined mechanical and environmental stress.
Which IEEE standard addresses composite insulator application?
IEEE 987 is the primary standard covering the application and testing of composite insulators for overhead power lines. IEEE 1898 specifically addresses standard definitions and performance requirements for non-ceramic insulators. These standards provide guidance on mechanical loading, electrical performance, and environmental testing protocols that utilities should reference during specification and procurement.
How do composites compare to porcelain in heavy pollution?
Composite insulators generally outperform porcelain in heavy pollution conditions due to their hydrophobic silicone rubber sheds that resist water film formation. Porcelain insulators require larger creepage distances and more frequent washing to maintain equivalent performance in contaminated environments. However, composites can suffer from permanent hydrophobicity loss under severe corona exposure, which porcelain does not experience.
What specs should utilities define when procuring composite insulators?
Utilities should specify voltage class, mechanical load rating, creepage distance, and hydrophobicity retention requirements. Procurement documents must include standards compliance references such as IEEE 987 or IEC 61109. Additional specifications should address corona resistance, pollution performance class, and required testing protocols including routine and type tests to ensure long-term field performance.