
When a wedge anchoring a fiber route slips, the fault hides in plain sight. The cable stays on the pole, the span still looks straight, and traffic keeps running until the sag grows or the jacket starts to creep. Anchor tension clamp installation is where that failure gets prevented, because the dead-end transfers the full span load into the structure. Fiber makes the job less forgiving than copper ever was.
RaxPower has manufactured pole line hardware in Hebei since 2003. The anchor tension clamp installation sequence below reflects what FTTx contractors and utility crews ask our engineering desk before a dead-end goes up. Match the clamp, seat the wedge, set tension, and verify before the bucket comes down.
What an Anchor Tension Clamp Does on Fiber Routes
An anchor tension clamp is the dead-end fitting that terminates a span and hands its full longitudinal load to the pole, bracket, or tower. On fiber routes it anchors self-supporting ADSS and figure-8 cable at terminals, corners, and direction changes with angles up to 90 degrees. Suspension hardware such as the ADSS suspension clamp carries vertical weight; a dead-end carries tension. Mixing up those two jobs is the fastest route to jacket creep and signal loss.
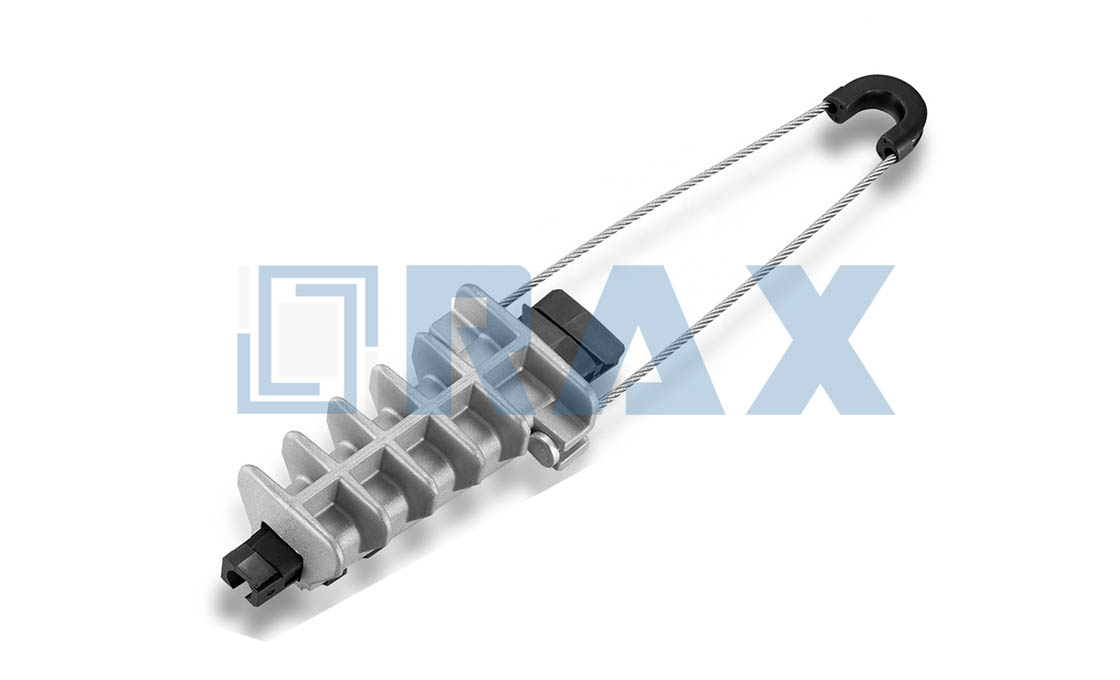
Wedge clamps dominate short and medium FTTx spans for one reason: the wedge adjusts itself. Pull the cable and the wedge cams tighter, as if the grip were a knot that only cinches harder. The polymer body is UV-stabilized, the bail is hot-dip galvanized steel, and no torque tools appear anywhere in the assembly.
The load path explains the hardware choices. Span tension enters the clamp through friction on the jacket, passes into the wedge and housing, then into the bail, the bracket, and finally the pole. Every interface in that chain is a place where installation quality either preserves or destroys the engineered ratings. That chain is why a bracket bolt counts as dead-end hardware as much as the clamp does. The fitting looks simple, which is exactly why it gets installed carelessly.
Match the Clamp to the Cable First
Every anchor tension clamp installation starts with two numbers from the drum label: cable type and jacket diameter. Published wedge windows differ from one family to the next, so match the model, not the category. One published model tensions 8 to 12 mm ADSS with tensile strength up to 3 kN. An 8 to 14 mm equivalent rates its loop for spans up to 120 m, breaking at 2.8 kN. One published family covers 6 to 20 mm across six size bands, breaking from 500 to 600 daN.
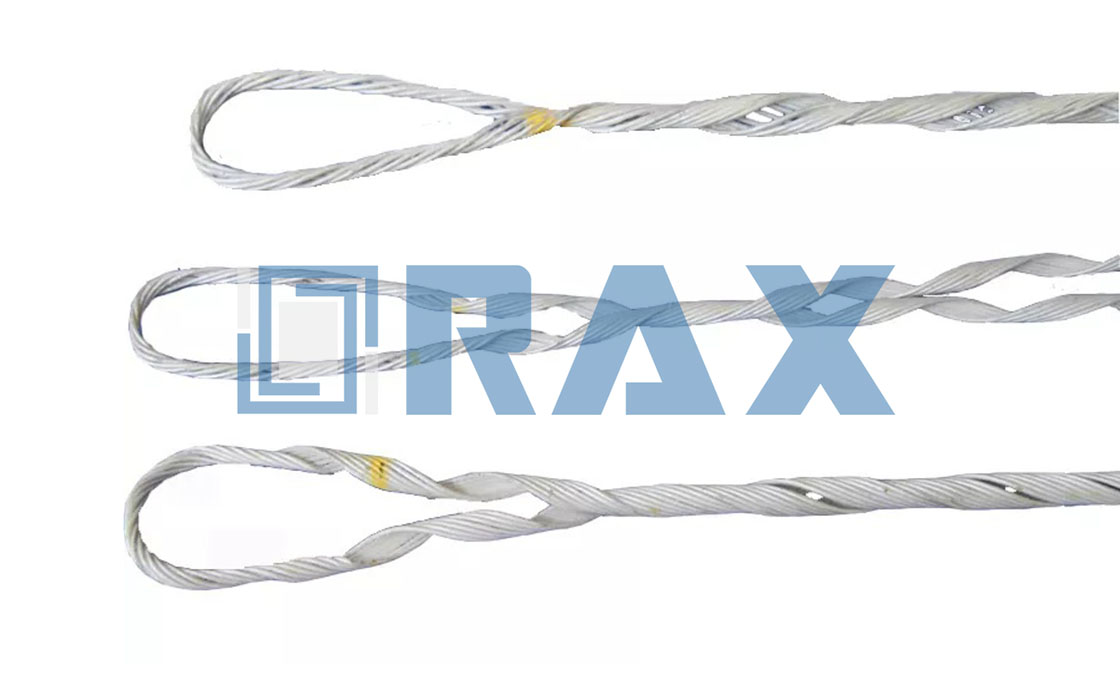
Figure-8 cable needs either a clamp rated for the full composite diameter or a figure-8-specific wedge built for that profile. Softer drop cable calls for a different answer entirely. Formed-wire dead-ends wrap the cable and spread the pull into low, uniform radial pressure. Preformed Line Products notes this design secures a pliable drop surface without causing attenuation. Preformed sets stay the default at terminal and corner positions on longer ADSS builds.
| Cable scenario | Dead-end choice | Watch point |
|---|---|---|
| Round ADSS, sized to the measured OD | Polymer wedge anchor clamp | Trust calipers over the drum label |
| Figure-8 self-supporting | Figure-8 wedge or full-profile clamp | Confirm the wedge accepts the composite profile |
| Soft drop cable | Preformed dead-end | Formed wire avoids attenuating the jacket |
When the drum label and the calipers disagree, believe the calipers. Jacket measurements drift with production tolerance, and a clamp that barely fits on paper will struggle to seat properly in the field.
Rig Up: Tools and Pole Preparation
Polymer wedge clamps are deliberately tool-light. The kit is the clamps and their brackets, a correctly sized pole bracket or hook, and a way to confirm jacket diameter before the cable leaves the drum. Everything else the job rewards is preparation at the structure. A bracket that fits a round wood pole will not fit an octagonal concrete one, so confirm the pole material before hardware leaves the warehouse.
- Confirm pole condition and mounting height against the route drawing.
- Verify cable diameter from the drum label, then again on the jacket itself.
- Check the bracket or hook rating against the span’s calculated dead-end load.
- Stage clamps for every pole, plus spares, before the reel ships.
In our experience, crews that stage every clamp and bracket before the first climb finish the route with fewer re-visits than crews that sort hardware at height. Preparation is the cheapest labor on the job.
Step-by-Step Anchor Tension Clamp Installation
The full anchor tension clamp installation sequence below follows the tool-free procedure published with the anchoring clamp family, repeated at every dead-end on the route. One pole position sets the quality standard for the whole line. Work it slowly the first time, then let repetition hold the standard.
1. Insert the wedge and place the cable
Slide the wedge into the clamp housing until it seats. Inspect the housing as you work; a cracked body or a mismatched wedge from another family can spoil the seat. Lay the cable into the channel at full jacket thickness. No stripping, no separation of supporting elements; the wedge system grips the outer sheath.
2. Seat the wedge under hand pressure
Pull the cable end and slide the wedge until it clamps. Hand force is enough; a self-adjusting wedge tightens further as span tension rises, so the grip you set on the ground becomes tighter in the air. Feed the cable straight off the drum so no twist travels into the clamp.
3. Fix the bail to the structure
Hook the galvanized bail over the bracket, pole hook, or crossarm point chosen during planning. The clamp should hang freely, with the bail fully engaged and no sharp edge touching the jacket anywhere in the loop.
4. Keep a smooth exit at the pole
Check the cable path where it leaves the clamp. A sharp exit presses the jacket against the bracket at the exact point where clamping pressure is already highest, so give the exit angle room and keep the bend gentle.
5. Tension the span against the chart
With the dead-end made off, tension the span to the project’s sag chart. The clamp holds the load; it never decides the load. Crews that pull by feel are guessing with the cable’s attenuation budget. Watch the clamp while tensioning; slip shows up as slow creep of cable through the housing while the sag settles toward the chart.
6. Form and store the service loop
Coil the assigned slack and store it on the bracket, clear of the clamp and hardware edges. The loop absorbs future work: a splice, a pole replacement, or storm repair.
Set Tension, Sag and Service Loops
ADSS cable is all-dielectric, so tension discipline is what actually protects the glass. Clamp ratings define the ceiling. Working loads sit near 2 kN with breaking near 2.8 kN on one published 8 to 14 mm design, and up to 3 kN on another. Those are limits, not targets. The span chart, not the clamp, decides how hard the cable is pulled.
Leave the storage loop at every dead-end. By the time a crew restores a storm-hit route, the loop already on the bracket is the cheapest repair part on the truck. A route without slack turns every future splice into an emergency cable order.
Sag is the visible half of tension. Too little tension leaves the span dancing in wind; too much loads the fibers against the jacket’s long-term limits. Read the chart for the actual span length and cable design, and treat those numbers as the day’s acceptance criteria.
Choosing Hardware That Survives the Route
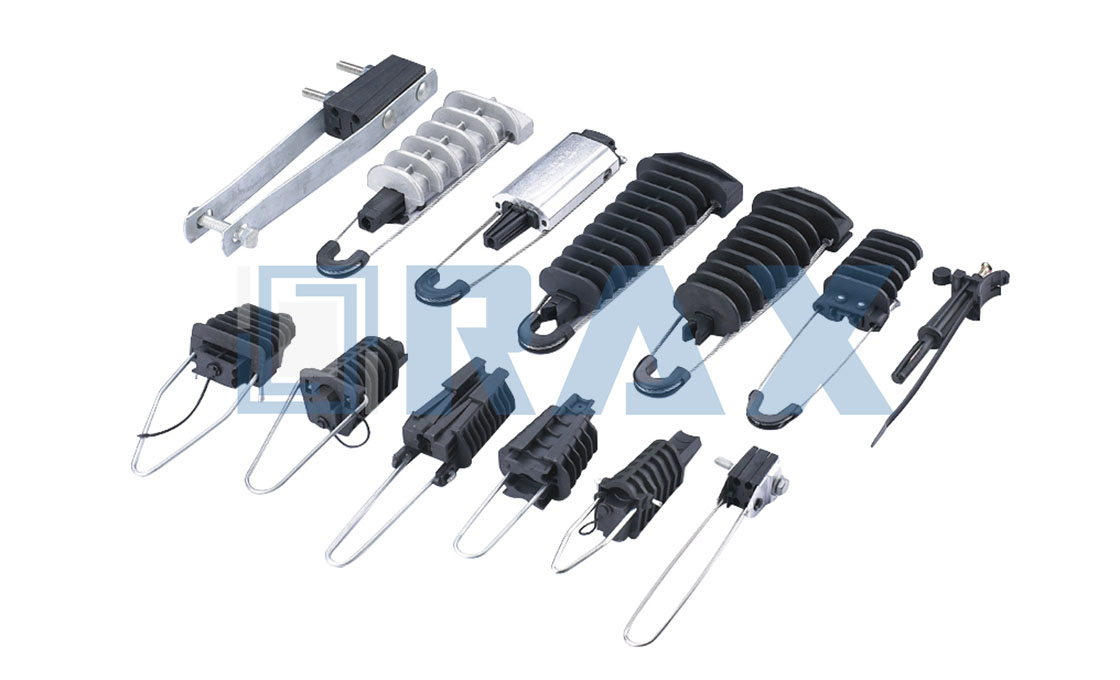
Hardware short-listing comes down to four lines: cable diameter range, breaking load, temperature window, and UV stability. Those ratings belong to families, not to the category. The anchoring clamp family on the product page linked below is rated from -60 to +60 degrees Celsius, with anti-aging performance specified beyond 25 years of outdoor service. A competing polymer design publishes -40 to +60 degrees Celsius instead.
Brackets and hooks deserve the same scrutiny as the clamp. The dead-end chain is only as strong as its weakest attachment, and the full fiber optic cable hardware range exists to complete it.
Compare the anchoring clamp family built for ADSS, figure-8, and drop-cable dead-ends, sized from 6 to 20 mm.
Fiber Callbacks That Trace Back to Installation
Most fiber dead-end callbacks repeat the same three mistakes. The clamp was sized from a spec sheet instead of the measured jacket. The wedge was seated without pull, so the first wind load did the final tightening on a live route. Or the exit at the pole was sharp enough to press the jacket into the bracket under full tension.
Sag complaints and attenuation mysteries usually share one root: tension set by feel instead of by chart. Squeezing a soft jacket raises attenuation, which is exactly the failure mode formed-wire dead-ends were invented to avoid. Under-tensioning shows up later as wind flutter and jacket wear at the bracket. Both directions of error cost a re-climb, and the second visit is never budgeted.
A quieter habit causes damage too: hardware pulled from a scrap pile and mixed into a new build. Corroded bails, worn wedges, and unknown load history have no place in a dead-end expected to hang for decades.
Verify the Work Before You Leave Site
A dead-end check takes less time than the re-climb it prevents. Confirm the bail is fully seated, the clamp hangs plumb, and the wedge has not backed out of the housing. Load the span side by hand; a properly seated wedge will not creep. Then read the sag against the chart one last time before the bucket comes down. Write the numbers down; a line in the job log settles any later dispute about the route’s as-built condition.
Photograph the finished dead-end and file it with the same record.
- Clamp model matches the measured jacket diameter.
- Bail engaged, bracket tight, clamp hanging free.
- Span tension and sag read against the chart.
- Service loop formed, stored, and clear of the clamp.
Frequently Asked Questions About Wedge Dead-End Clamps
How tight does a wedge anchor tension clamp need to be?
Hand pressure only. Slide the wedge until it grips, because a self-adjusting wedge cams tighter as span load rises. Torque tools play no part in a polymer wedge assembly.
Where should anchor tension clamps be placed on a route?
At dead-end positions: terminals, corners, and direction changes with angles up to 90 degrees. Suspension clamps carry vertical load everywhere else, so mid-span positions belong to suspension hardware, not to a dead-end fitting.
When is a preformed dead-end the better choice?
On soft drop cable and longer ADSS builds. Formed wire spreads the pull into low, uniform radial pressure and holds a pliable jacket without causing attenuation, while a wedge concentrates grip on one short channel.
How long does a UV-stabilized wedge clamp last outdoors?
Published ratings belong to families, not to the category. One anchoring clamp family is rated beyond 25 years across -60 to +60 degrees Celsius; another polymer design quotes -40 to +60 degrees Celsius.
What does the final anchor tension clamp installation check include?
Model versus measured diameter, bail fully engaged, clamp hanging free, span tension read against the sag chart, and a formed service loop. Gentle hand loading on the span side should show zero creep.
A Dead-End Done Right Stays Invisible
Nobody photographs a dead-end that quietly works for decades. The reward for careful anchor tension clamp installation is the absence of events. No sag complaints, no re-tensioning visits, no attenuation mysteries in an OTDR trace.
That absence is what RaxPower builds for. Since 2003 the company has hot-forged pole line hardware for utilities, contractors, and distributors worldwide. The anchoring clamp family carries the same brief: simple parts, honestly rated, installed with discipline.