
Quando uma cunha que ancora uma rota de fibra escorrega, a falha se esconde à vista de todos. O cabo permanece no poste, o vão ainda parece reto, e o tráfego continua até que a flecha cresça ou a jacket comece a se deformar. A instalação do grampo de tensão de âncora é onde essa falha é impedida, porque o dead-end transfere toda a carga longitudinal do vão para a estrutura. A fibra torna o serviço menos tolerante do que o cobre já foi.
A RaxPower fabrica ferragens para rede aérea em Hebei desde 2003. A sequência de instalação do grampo de tensão de âncora abaixo reflete o que contratados FTTx e equipes de utilidade perguntam ao nosso escritório de engenharia antes de um dead-end ser instalado. Combine o grampo, assente a cunha, defina a tensão e verifique antes que o caminhão-baia desça.
O que um Grampo de Tensão de Âncora Faz em Rotas de Fibra
Um grampo de tensão de âncora é o acessório dead-end que termina um vão e transfere sua carga longitudinal completa para o poste, suporte ou torre. Em rotas de fibra, ancora cabos ADSS auto-sustentáveis e figure-8 nos terminais, cantos e mudanças de direção com ângulos de até 90 graus. Hardware de suspensão como o Grampo de suspensão ADSS suporta peso vertical; um dead-end suporta tensão. Confundir esses dois serviços é o caminho mais rápido para deformação da jacket e perda de sinal.
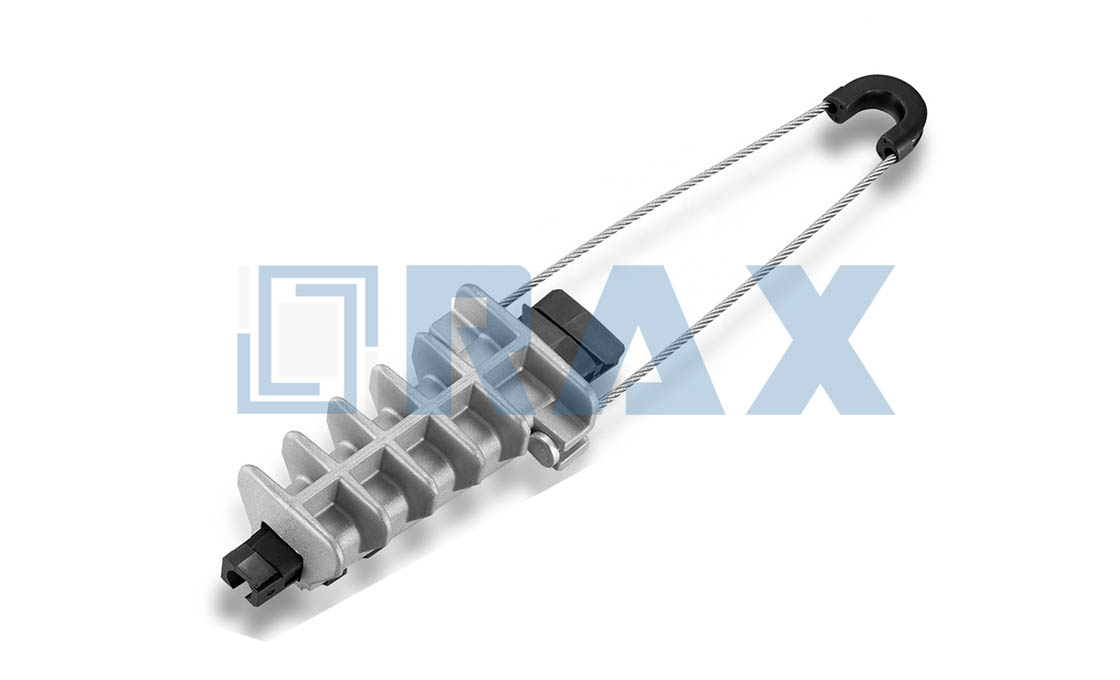
Grampos de cunha dominam vãos FTTx curtos e médios por um motivo: a cunha se ajusta sozinha. Puxe o cabo e os cames da cunha apertam mais, como se a aderência fosse um nó que só se aperta mais. O corpo polimérico é estabilizado contra UV, a alça é aço galvanizado por imersão quente, e nenhuma ferramenta de torque aparece em qualquer parte do conjunto.
O caminho de carga explica as escolhas de ferragens. A tensão do vão entra no grampo através do atrito na jacket, passa para a cunha e a carcaça, então para a alça, o suporte e finalmente o poste. Cada interface nessa cadeia é um ponto onde a qualidade da instalação preserva ou destrói as classificações de engenharia. É por isso que um parafuso de suporte conta como dead-end tanto quanto o grampo. O acessório parece simples, e é exatamente por isso que é instalado descuidadamente.
Combine o Grampo com o Cabo Primeiro
Toda instalação de grampo de tensão de âncora começa com dois números da etiqueta do tambor: tipo de cabo e diâmetro da jacket. Janelas de cunha publicadas diferem de uma família para a próxima, então combine o modelo, não a categoria. Um modelo publicado tensione 8 a 12 mm ADSS com resistência à tração de até 3 kN. Um equivalente de 8 a 14 mm classifica seu laço para vãos de até 120 m, rompendo em 2,8 kN. Uma família publicada cobre 6 a 20 mm em seis bandas de tamanho, rompendo de 500 a 600 daN.
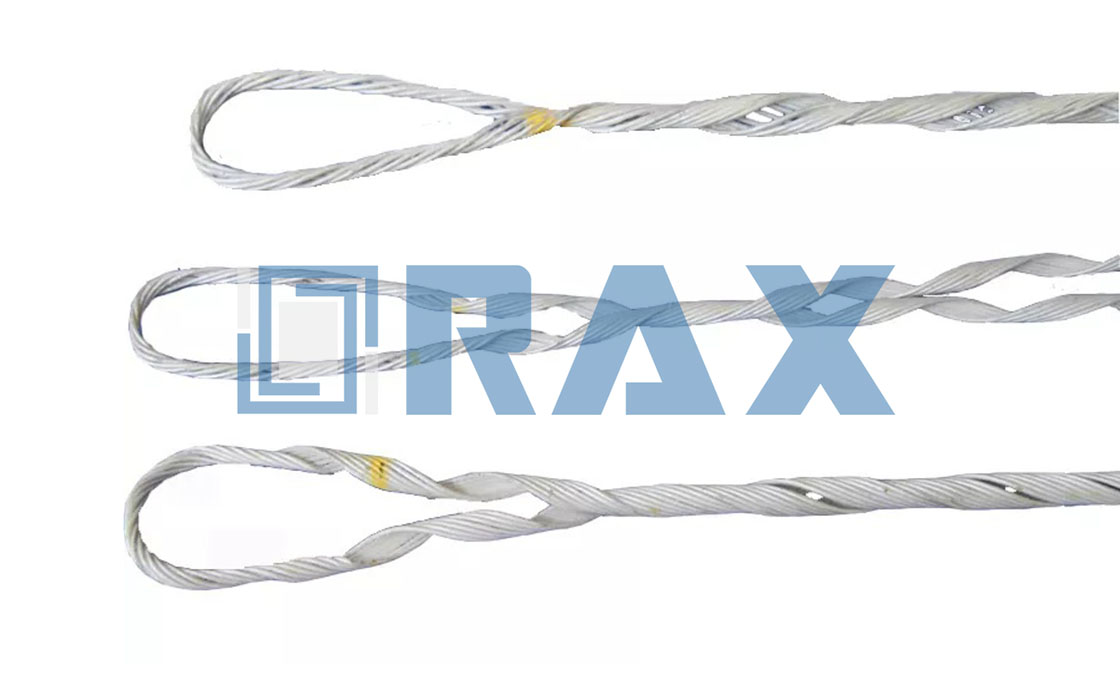
Cabo figure-8 precisa ou de um grampo classificado para o diâmetro composto total ou de uma cunha específica para figure-8 construída para esse perfil. Cabo drop mais macio exige uma resposta completamente diferente. Dead-ends de fio formado envolvem o cabo e distribuem o puxão em pressão radial baixa e uniforme. A Preformed Line Products nota que esse design segura uma superfície drop dúctil sem causar atenuação. Conjuntos preformados permanecem o padrão em posições de terminal e canto em construções ADSS mais longas.
| Cenário de cabo | Escolha de dead-end | Ponto de atenção |
|---|---|---|
| ADSS redondo, dimensionado conforme o OD medido | Grampo de âncora de cunha polimérico | Confie nos paquímetros acima da etiqueta do tambor |
| Figure-8 auto-sustentável | Cunha figure-8 ou grampo de perfil completo | Confirme que a cunha aceita o perfil composto |
| Cabo drop macio | Dead-end preformado | Fio formado evita atenuar a jacket |
Quando a etiqueta do tambor e os paquímetros discordam, confie nos paquímetros. Medições de jacket variam com tolerância de produção, e um grampo que mal cabe no papel terá dificuldade para assentar corretamente em campo.
Montagem: Ferramentas e Preparação do Poste
Grampos de cunha poliméricos são intencionalmente leves em ferramentas. O kit são os grampos e seus suportes, um suporte ou gancho de poste corretamente dimensionado, e uma maneira de confirmar o diâmetro da jacket antes que o cabo saia do tambor. Tudo o mais que o trabalho recompensa é preparação na estrutura. Um suporte que cabe em um poste redondo de madeira não caberá em um octogonal de concreto, então confirme o material do poste antes que a ferragem saia do armazém.
- Confirme a condição do poste e a altura de montagem conforme o desenho da rota.
- Verify cable diameter from the drum label, then again on the jacket itself.
- Check the bracket or hook rating against the span’s calculated dead-end load.
- Stage clamps for every pole, plus spares, before the reel ships.
In our experience, crews that stage every clamp and bracket before the first climb finish the route with fewer re-visits than crews that sort hardware at height. Preparation is the cheapest labor on the job.
Instalação Passo a Passo do Grampo de Tensão de Âncora
The full anchor tension clamp installation sequence below follows the tool-free procedure published with the anchoring clamp family, repeated at every dead-end on the route. One pole position sets the quality standard for the whole line. Work it slowly the first time, then let repetition hold the standard.
1. Insira a cunha e posicione o cabo
Slide the wedge into the clamp housing until it seats. Inspect the housing as you work; a cracked body or a mismatched wedge from another family can spoil the seat. Lay the cable into the channel at full jacket thickness. No stripping, no separation of supporting elements; the wedge system grips the outer sheath.
2. Assente a cunha sob pressão manual
Pull the cable end and slide the wedge until it clamps. Hand force is enough; a self-adjusting wedge tightens further as span tension rises, so the grip you set on the ground becomes tighter in the air. Feed the cable straight off the drum so no twist travels into the clamp.
3. Fixe a alça à estrutura
Hook the galvanized bail over the bracket, pole hook, or crossarm point chosen during planning. The clamp should hang freely, with the bail fully engaged and no sharp edge touching the jacket anywhere in the loop.
4. Mantenha uma saída suave no poste
Check the cable path where it leaves the clamp. A sharp exit presses the jacket against the bracket at the exact point where clamping pressure is already highest, so give the exit angle room and keep the bend gentle.
5. Tensione o vão conforme o gráfico
With the dead-end made off, tension the span to the project’s sag chart. The clamp holds the load; it never decides the load. Crews that pull by feel are guessing with the cable’s attenuation budget. Watch the clamp while tensioning; slip shows up as slow creep of cable through the housing while the sag settles toward the chart.
6. Forme e armazene o laço de serviço
Coil the assigned slack and store it on the bracket, clear of the clamp and hardware edges. The loop absorbs future work: a splice, a pole replacement, or storm repair.
Definir Tensão, Flecha e Laços de Serviço
ADSS cable is all-dielectric, so tension discipline is what actually protects the glass. Clamp ratings define the ceiling. Working loads sit near 2 kN with breaking near 2.8 kN on one published 8 to 14 mm design, and up to 3 kN on another. Those are limits, not targets. The span chart, not the clamp, decides how hard the cable is pulled.
Leave the storage loop at every dead-end. By the time a crew restores a storm-hit route, the loop already on the bracket is the cheapest repair part on the truck. A route without slack turns every future splice into an emergency cable order.
Sag is the visible half of tension. Too little tension leaves the span dancing in wind; too much loads the fibers against the jacket’s long-term limits. Read the chart for the actual span length and cable design, and treat those numbers as the day’s acceptance criteria.
Escolhendo Ferragens que Sobrevivem na Rota
Hardware short-listing comes down to four lines: cable diameter range, breaking load, temperature window, and UV stability. Those ratings belong to families, not to the category. The anchoring clamp family on the product page linked below is rated from -60 to +60 degrees Celsius, with anti-aging performance specified beyond 25 years of outdoor service. A competing polymer design publishes -40 to +60 degrees Celsius instead.
Brackets and hooks deserve the same scrutiny as the clamp. The dead-end chain is only as strong as its weakest attachment, and the full hardware para cabo de fibra óptica range exists to complete it.
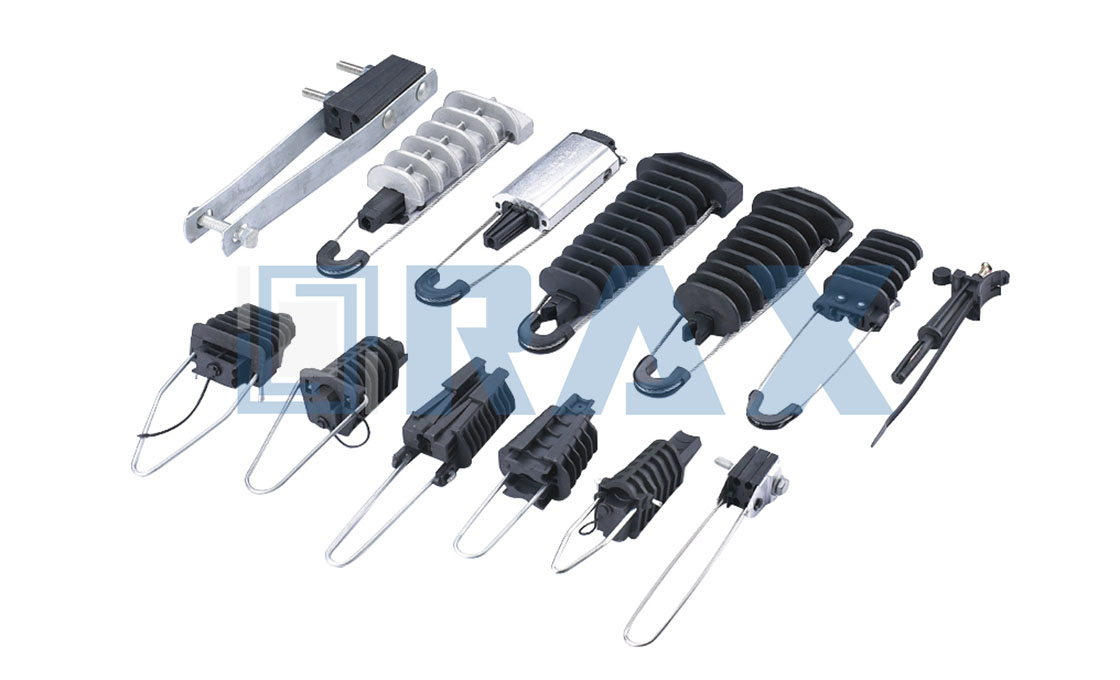
Compare the anchoring clamp family built for ADSS, figure-8, and drop-cable dead-ends, sized from 6 to 20 mm.
Retornos de Fibra que Remontam à Instalação
Most fiber dead-end callbacks repeat the same three mistakes. The clamp was sized from a spec sheet instead of the measured jacket. The wedge was seated without pull, so the first wind load did the final tightening on a live route. Or the exit at the pole was sharp enough to press the jacket into the bracket under full tension.
Sag complaints and attenuation mysteries usually share one root: tension set by feel instead of by chart. Squeezing a soft jacket raises attenuation, which is exactly the failure mode formed-wire dead-ends were invented to avoid. Under-tensioning shows up later as wind flutter and jacket wear at the bracket. Both directions of error cost a re-climb, and the second visit is never budgeted.
A quieter habit causes damage too: hardware pulled from a scrap pile and mixed into a new build. Corroded bails, worn wedges, and unknown load history have no place in a dead-end expected to hang for decades.
Verifique o Trabalho Antes de Deixar o Local
A dead-end check takes less time than the re-climb it prevents. Confirm the bail is fully seated, the clamp hangs plumb, and the wedge has not backed out of the housing. Load the span side by hand; a properly seated wedge will not creep. Then read the sag against the chart one last time before the bucket comes down. Write the numbers down; a line in the job log settles any later dispute about the route’s as-built condition.
Photograph the finished dead-end and file it with the same record.
- Clamp model matches the measured jacket diameter.
- Bail engaged, bracket tight, clamp hanging free.
- Span tension and sag read against the chart.
- Service loop formed, stored, and clear of the clamp.
Perguntas Frequentes sobre Grampos de Dead-End de Cunha
Quão apertado precisa ser um grampo de tensão de âncora de cunha?
Apenas pressão manual. Deslize a cunha até que ela prenda, pois uma cunha autoajustável se ancora com mais força conforme a carga na abertura aumenta. Ferramentas de torque não são utilizadas em conjuntos de cunhas de polímero.
Onde os grampos de tensão de âncora devem ser colocados em uma rota?
At dead-end positions: terminals, corners, and direction changes with angles up to 90 degrees. Suspension clamps carry vertical load everywhere else, so mid-span positions belong to suspension hardware, not to a dead-end fitting.
Quando um dead-end preformado é a melhor escolha?
On soft drop cable and longer ADSS builds. Formed wire spreads the pull into low, uniform radial pressure and holds a pliable jacket without causing attenuation, while a wedge concentrates grip on one short channel.
Quanto tempo dura um grampo de cunha estabilizado contra UV ao ar livre?
Published ratings belong to families, not to the category. One anchoring clamp family is rated beyond 25 years across -60 to +60 degrees Celsius; another polymer design quotes -40 to +60 degrees Celsius.
O que a verificação final de instalação do grampo de tensão de âncora inclui?
Model versus measured diameter, bail fully engaged, clamp hanging free, span tension read against the sag chart, and a formed service loop. Gentle hand loading on the span side should show zero creep.
Um Dead-End Bem Feito Permanece Invisível
Nobody photographs a dead-end that quietly works for decades. The reward for careful anchor tension clamp installation is the absence of events. No sag complaints, no re-tensioning visits, no attenuation mysteries in an OTDR trace.
That absence is what RaxPower builds for. Since 2003 the company has hot-forged pole line hardware for utilities, contractors, and distributors worldwide. The anchoring clamp family carries the same brief: simple parts, honestly rated, installed with discipline.