
Every crossarm, brace and guy attachment on an overhead structure ends up leaning on one small piece of steel: a bolt. The bolt family on a pole looks deceptively uniform. Yet each member takes load in a different direction, grips the pole in a different way and fails in a different manner. When the wrong member is picked, the mistake usually stays hidden until the first ice load or the first climb.
Our order desk sees the consequences directly. Some inquiries ask for "the same bolt as last time" with no diameter, length or standard. Others list three different head styles for the same attachment. The RaxPower order desk also keeps the dimension sheets behind every claim in this guide. This guide sorts the pole line bolt family by the job each bolt actually does. It then walks through sizing logic, installation practice, torque behavior and the wording a purchase specification needs.
What a Pole Line Bolt Has to Hold
A distribution structure is a small load collection point. Conductors pull one way, guys pull another, and equipment mass presses straight down. Every one of those load paths crosses from a fitting into the pole or crossarm through a bolted joint.
The phrase "pole line bolts" therefore covers a working set rather than a single part. It spans machine bolts, double-arming bolts, lag screws, eye bolts, clevis and double-end studs, plus the nuts and washers that close each joint. Standards treat them as one group. IEEE C135.1 is the long-standing baseline. It covers zinc-coated steel bolts and nuts "commonly used in overhead line construction." Its newer companion C135.80 extends the same approach to eye bolts, lag screws, washers and staples.
What holds the line together is not any single bolt but the division of labor among them. The sections below follow that division: who carries shear, who resists withdrawal, who takes a angled pull, and who simply clamps two parts of the structure together.
That is the quiet promise pole line bolts make to a structure, and the promise holds only when each family stays in its own load path.
The Bolt Family on One Structure
Picture one wood distribution pole on a quiet feeder. Near the top, a crossarm is pressed to the pole face by a through machine bolt. Below it, a pair of arms is held at a fixed spacing by double-arming bolts at each end. A brace meets the arm with a smaller machine bolt, a transformer حامل hangs on lag screws, and a guy wire terminates at an eye bolt lower down the pole.
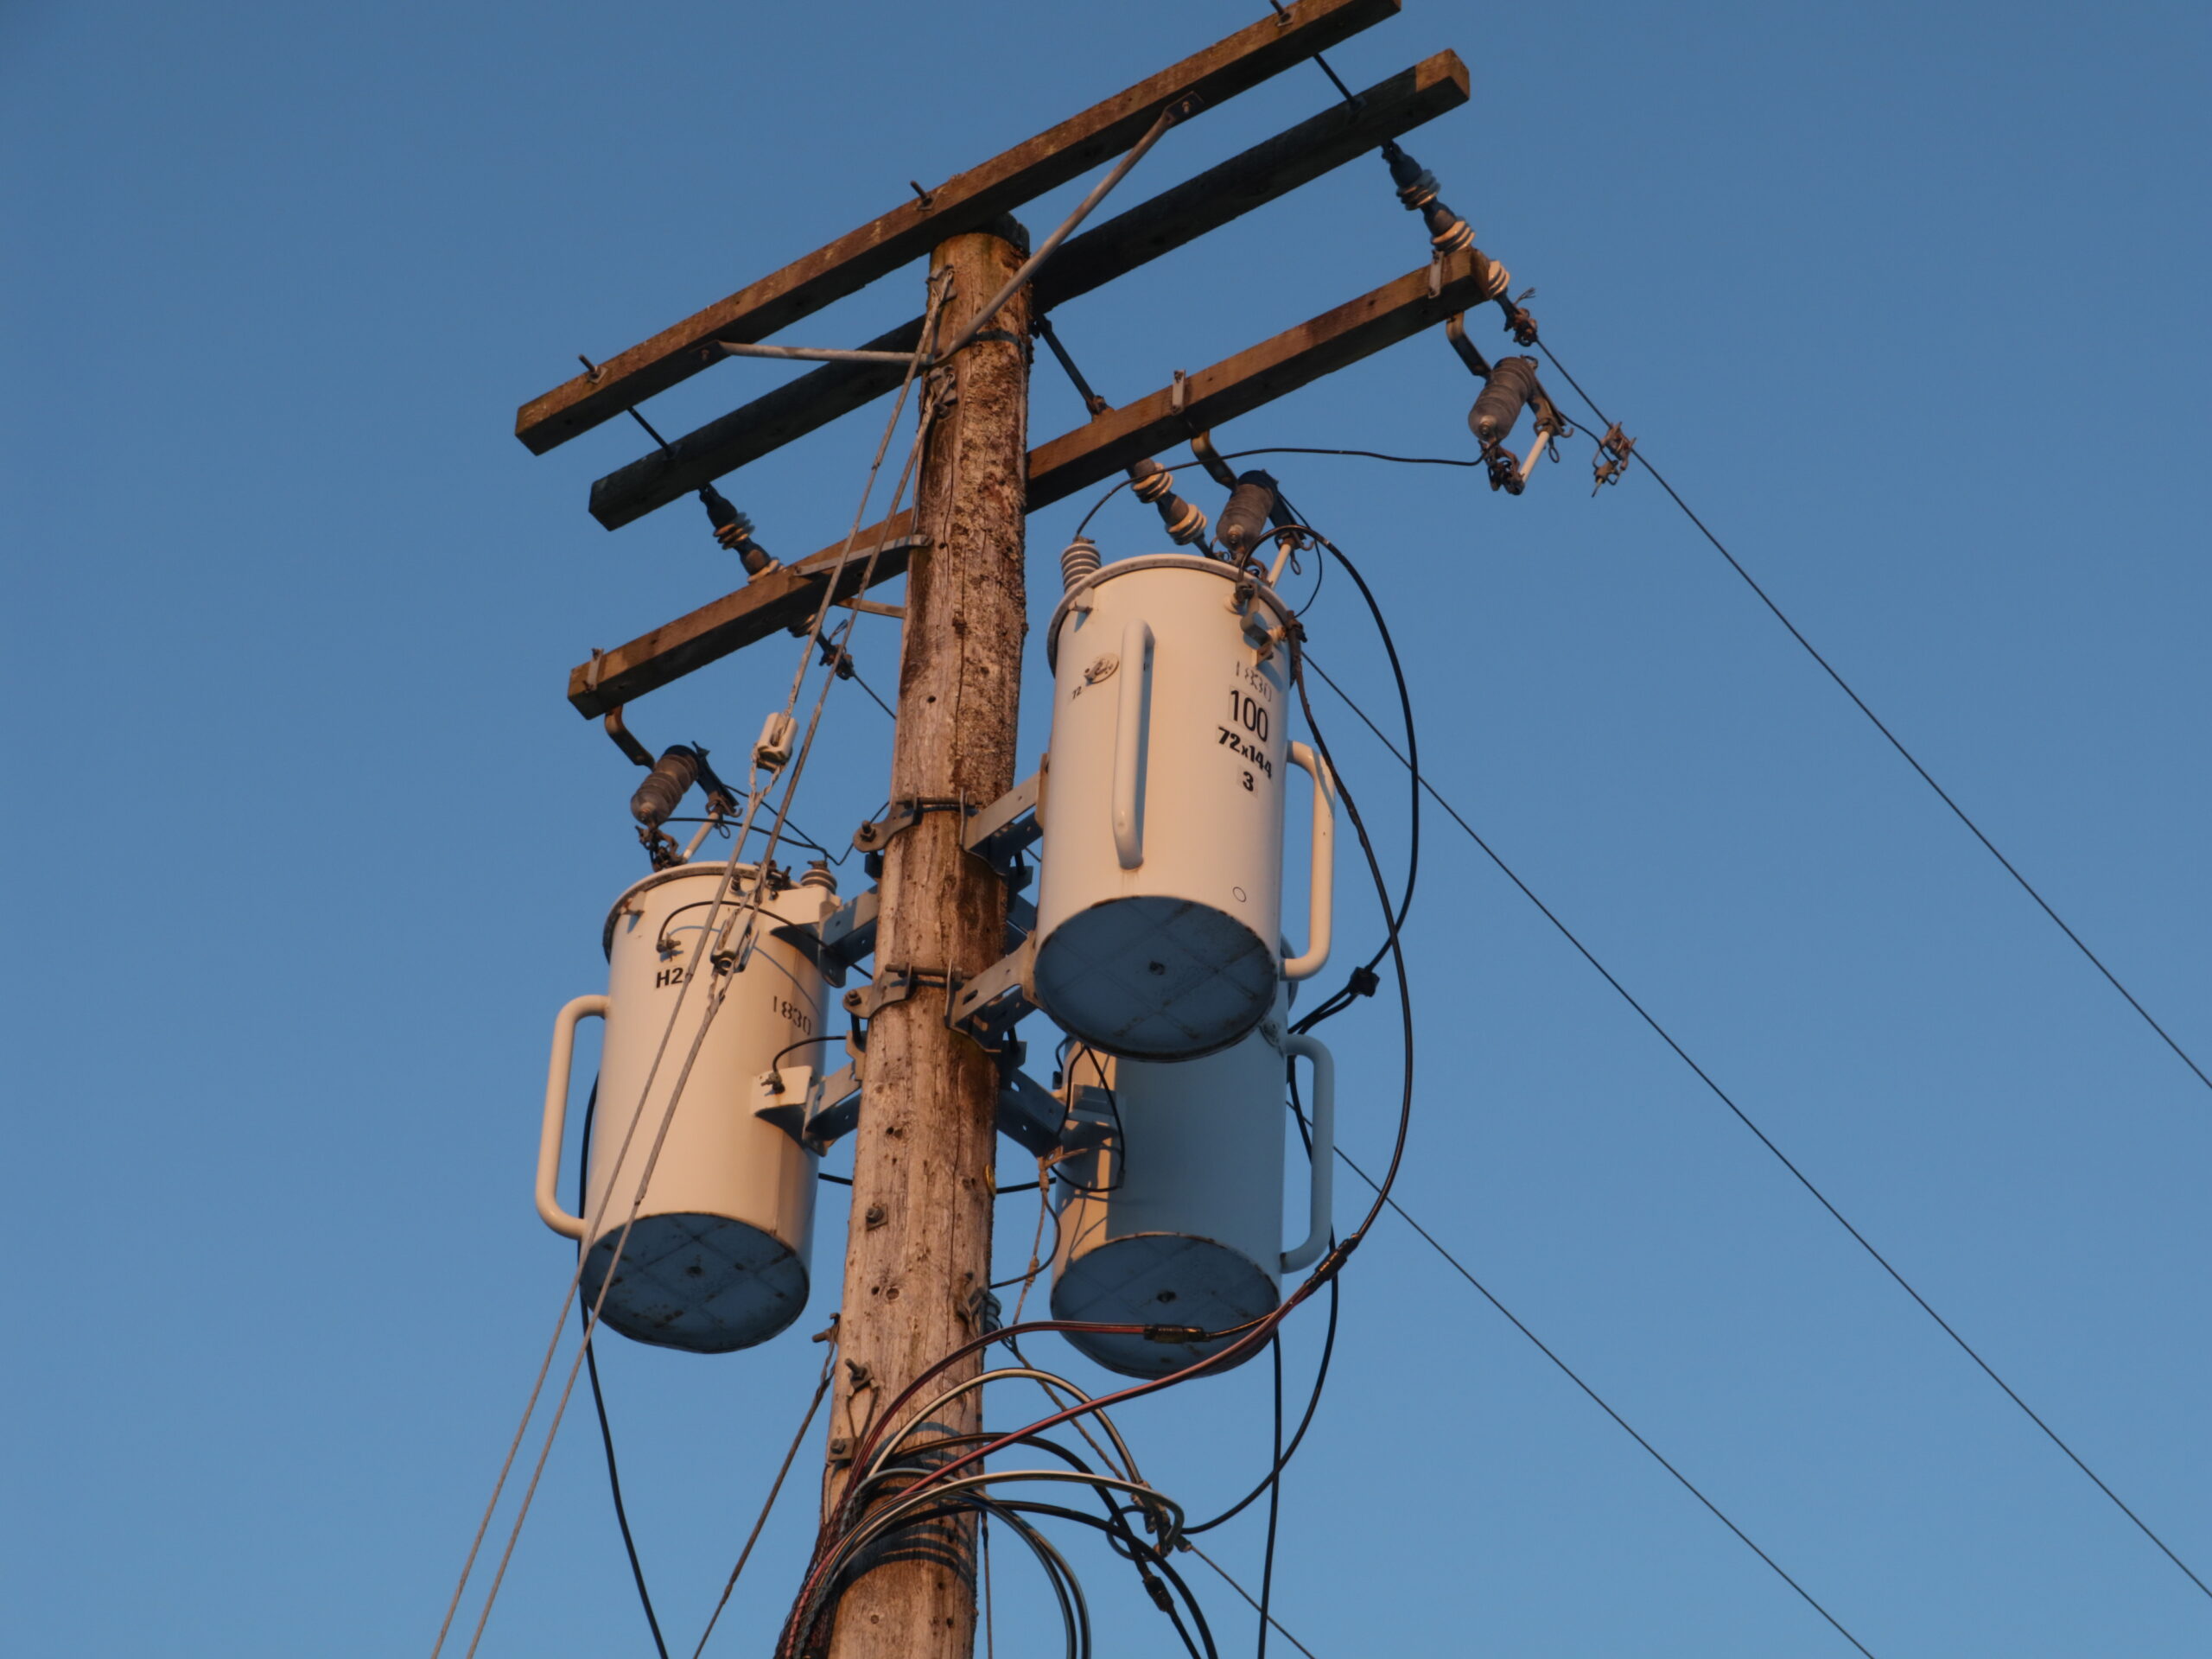
Each of those attachments chose its bolt for a mechanical reason. The through bolt is there because the crossarm load is mostly shear across the pole face. The lag screws are there because the bracket load is light and drilling clean through a live pole is unnecessary. The eye bolt is there because the guy pulls at an angle and needs a forged eye to carry it.
Reading a pole this way turns the hardware catalog into a load map. The rest of this guide walks that map from the strongest member to the smallest.
Machine Bolts Carry the Shear Path
The square head machine bolt is the structural backbone of pole framing. It passes clean through pole or crossarm, grips with a square washer and square nut on the far side, and transfers load through the bolt shank in shear. The square head exists so a lineman's wrench can seat the bolt from one side while the nut is held from the other.

Machine bolts suit the jobs where the load is shared and permanent. Think crossarm-to-pole joints, brace connections, switching equipment brackets and any attachment whose failure would drop hardware to the ground. Manufacturers list them in a wide range. A typical مثبت خط الأعمدة program covers cable suspension, brace, carriage, clevis, double arming, machine, oval eye, shoulder eye, spool and thimble eye bolts side by side.
Two details matter at ordering time. First, thread length: the shank must stay smooth through the shear plane, because threads inside a shear plane both weaken the bolt and chew the hole. Second, point style: long bolts for large poles usually need a semi-cone point so the tip eases through the far face instead of splintering it.
Lag Screws Let Threads Do the Work
A lag screw is the opposite trade. Nothing passes through the pole; the screw cuts its own thread into the wood and holds by withdrawal resistance along its shank. That makes it the right tool for lighter equipment: signs, streetlight brackets, small transformer racks, grounding molds and secondary clevises.
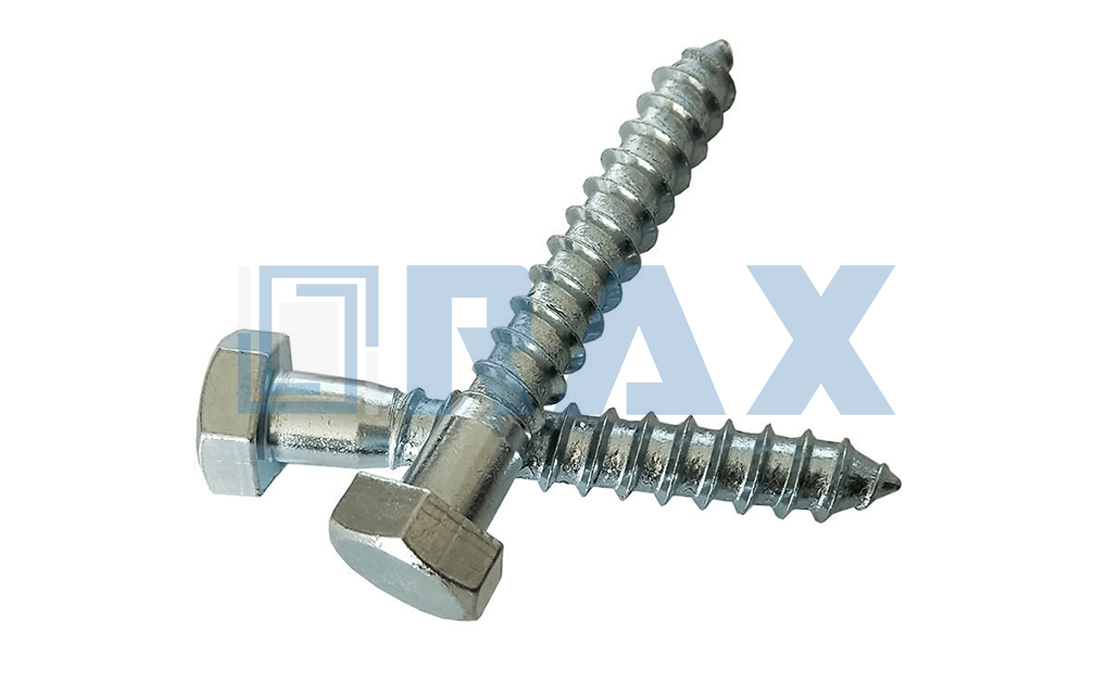
The strength of a lag screw joint lives and dies on engagement depth. The threaded portion must bury itself fully in sound wood, which is why screw length is chosen as attachment thickness plus a generous grip allowance. A lag screw that stops with half its threads in the weathered surface layer of an old pole holds far less than its catalog value.
Suppliers build the washers in from the start. Hex head lag screws are commonly offered with a neoprene-backed steel washer so the washer seals the hole against water while the steel face spreads the clamp load. That small detail keeps moisture out of the shank and slows the decay ring that eventually loosens light hardware.
When a Double-Arming Bolt Saves the Climb
A double-arming bolt is threaded on both ends with a plain middle in between. Its job is spacing: it holds two crossarms parallel on either side of the pole while the machine bolts through the assembly carry the actual shear. One fitting does the work of spacing and clamping at once.
The same twin-stud logic shows up elsewhere. Double-end studs fasten pole-mounted fittings that need a fixed projection, and they let a crew assemble hardware on the ground and hang the whole assembly in one motion. By the time a crew is working from a bucket in wind, that half-hour saved on the pole matters more than the price difference between fittings.
The failure mode to watch is cross-threading during assembly, because both ends are engaged at once in the field. Thread protection caps during transport cost nothing. Starting both nuts by hand before any wrench work does too. Together they prevent most of the galled joints we see returned for inspection.
Eye Bolts and the Geometry of Pull
Wherever a guy strand, a hoist block or an insulator string hangs from a pole, the attachment becomes an eye bolt. The eye changes the problem: load no longer runs along the shank but through the ring, and the ring wants to stay in the plane of the pull.
That plane is the whole art of eye bolt selection. A forged eye with a shoulder, seated square against the pole face and washered on the back, carries the rated load. The same eye left proud of the wood, or loaded sideways out of its plane, sees bending the forging was never meant to take. Our earlier guide on pigtail eye bolt load capacity walks through how sharply a side load cuts the working rating of an eye under pull.
Installation details follow from the geometry. The eye must point along the guy lead angle, and the shoulder must seat full-face. The nut also needs a washer wide enough to keep the shoulder from slowly crushing into the pole surface under load cycling.
Standards keep the same division visible on paper. The inch-series bolt standards for overhead line construction treat machine bolts and double-arming bolts as through fasteners. Lag screws sit in their own clause with their own dimensions, a quiet way of saying the two are never interchangeable. When a drawing calls a pole line bolt by the wrong family name, the factory question that follows is always about the load, not about the head.
How Each Bolt Takes Load Differently
It helps to put the family side by side, the way our companion piece on تكوينات مثبتات خطوط الأعمدة catalogs each shape. Machine bolts carry load in shear across the shank. Lag screws resist withdrawal along the thread. Double-arming bolts hold spacing while their neighbors carry shear. Eye bolts rotate the load path into a ring and hand it to a guy or a string.
| Bolt family | Primary load path | Grips by | Typical attachment |
|---|---|---|---|
| Machine bolt | Shear across shank | Nut and washer both faces | Crossarm, brace, equipment |
| Double-arming bolt | Tension in both studs | Nuts at both ends | Paired crossarm spacing |
| Lag screw | Withdrawal along threads | Thread engagement in wood | Brackets, signs, grounds |
| Eye bolt | Tension through the eye | Shoulder seat plus nut | Guys, blocks, strings |
The table also explains most field substitutions. Swapping a lag screw into a machine bolt location exchanges a shear joint for a withdrawal joint, which is why the practice fails on crossarms. Swapping a machine bolt into a lag screw location means drilling a live pole for no reason and losing the seal a neoprene washer provides.
Machine Bolt or Lag Screw: Reading the Load
The choice between these two families decides most joints, so it deserves a closer read. A machine bolt shares the load with the whole pole section. The shear spreads across bearing area on both faces, and the nut keeps the clamp even as wood shrinks and swells. A lag screw stands alone, and the wood around its threads is the entire working element.
That difference sorts the attachments cleanly. Anything that moves, vibrates or carries continuous tension belongs on a through bolt: crossarms, braces, arrester brackets on primary feeders, transformer racks. Anything static, light and serviceable belongs on a lag screw: equipment nameplates, ground wire molds, secondary service clevises on quiet residential spans.
The middle ground is where mistakes cluster. A small bracket for a splice box looks like lag screw work until the box collects a span of secondary cable, and the withdrawal load quietly doubles. The rule of thumb we apply is simple: if the attachment pulls, bolt it through; if it only hangs, lag it in.
Location on the pole matters too. Wood near the top of a pole weathers hardest, so lag screw grip up there should be judged against the softer outer layer. Lower on the structure, where a climb inspection reaches, a through bolt also gives the crew a nut to check rather than a thread to trust.
Choosing Diameter Before You Choose Length
Diameter is a strength decision, length is a geometry decision, and the order matters. The load calculation names the diameter. A brace connection and a crossarm center clamp do not share one, because shear area scales with the square of diameter and bending stiffness with its cube.
Utility practice keeps the menu short on purpose. Inch-based standards such as IEEE C135.1 grew around a handful of nominal diameters, and sticking to those sizes keeps nuts, washers and spare hardware interchangeable across a fleet. Every extra diameter added to a standard is a stocking cost paid for years.
In our experience the fastest way to waste a budget is diameter inflation: specifying the next size up "to be safe" across an entire bill of material. The heavier bolt needs bigger holes, which remove more wood section from the very pole it is protecting, so the safety gain can quietly reverse.
Length, Grip and Thread Engagement Basics
Once diameter is set, length follows the stack-up. Add attachment thickness, the pole or crossarm dimension at the hole, washer and nut allowance, and the projecting stub for the crew's wrench. Measure the pole at the working height, not at eye level, because taper steals a surprising amount of grip on large classes.
Two engagement rules keep the joint honest. The smooth shank must fill the shear plane completely, with threads beginning only beyond the attached fitting. And the nut must carry at least its full height of thread past the bearing face, so no joint relies on the last threads near a semi-cone point.
For lag screws the same arithmetic turns around: length is chosen first so that the unthreaded grip covers the attachment and the threads reach deep, sound wood. When a lag screw cannot reach its engagement target, the correct move is a longer screw or a through bolt, never a shallower hope.
Inspection closes the loop on diameter choice as well. A joint that was upsized for no reason shows its cost on every climb: larger holes, larger washers, and a pole face drilled thinner for no added margin. Pole line bolts earn their keep by being boringly consistent. A bill of material that reads in one diameter longer than the rest deserves a second look before the order goes out.
Drilling Holes That Fit the Bolt
A bolted timber joint works because the bolt bears on wood it fits snugly. Utility framing conventions therefore pair each nominal bolt size with a drill diameter only slightly larger than the shank. The fit stays tight enough to bear evenly and loose enough to drive without forcing.
The drilling habit matters as much as the chart. Holes are bored square to the face, in one pass, with the auger pulled before the retract so the exit side does not splinter. An oversize or reamed-wobbly hole concentrates the whole shear load on a sliver of bearing area and starts the joint working loose.
On old poles, drill where the wood is sound. Punching a new hole into decayed sapwood next to a retired fitting is the way you build a joint that measures correctly on paper and carries nothing in the wind. Crews that sound the pole first, then place the hole, keep their hardware tight for decades.
Washers and spacing finish the joint. Square plate washers under both head and nut spread the bearing over enough fiber that a season of wet-dry cycling cannot chew a dent into the pole. Doubling washers to make up a loose fit is a false fix, because stacked washers rock on each other and the clamp never settles.
Spacing follows the same logic as fit. A bolt hole sits a clear distance from the pole edge and from neighboring holes, so each joint keeps its full wedge of sound wood behind the bearing face. Where a crossarm already carries a bolt line, new holes go on the same centerline rather than staggered. Staggered drilling crosses the grain and invites a split to start between the holes.
Torque Practice on Wood Structures

Steel-to-steel torque habits do not transfer to a live pole. Wood creeps. A nut torqued to a steel value crushes the fibers under the washer, and by the next dry season the joint is loose enough to rattle. The field practice is therefore snug plus a defined turn: seat the connection fully, then compress the assembly evenly without burying the washer in the wood.
What "snug" means in practice is a joint with no visible gap, washers flat against sound wood, and the nut firm against a wrench rather than against a cheater bar. Crews then re-check the joint at the first maintenance visit, because most of the wood's initial set happens in the first season of wetting and drying.
Threads carry the torque, so galvanized threads need lubricant or a wax stick to reach a predictable clamp without galling. If a wrench keeps spinning without the nut advancing, stop and inspect rather than driving harder. Stripped threads inside a pole are a much bigger repair than a washer.
Hot-Dip Galvanizing and Field Corrosion Care
Pole line bolts live in a wet-dry cycle with salt, bird waste and contact with treated wood, so the zinc layer is part of the design, not a finish. Hot-dip galvanizing after fabrication coats the shank, the threads and the inside of the head, and inch-series bolt standards in overhead line work assume zinc-coated steel as the baseline condition.
Field handling decides how long that zinc lasts. Throwing a bucket of bolts across a rock right-of-way chips the coating exactly where the wrench will later work. Handling bolts in original crates, driving threads with a lubricant instead of reaming them, and never re-bending a washer all preserve the layer.
Where two galvanized surfaces meet, the zinc pair corrodes slowly and evenly. Where a galvanized bolt meets bare steel drill chips or copper grounding braid, the small anode works overtime. Brushing drill spoil out of the hole and keeping copper out of direct bolt contact are free corrosion engineering.
The structure changes the habit. On wood, snug plus a turn stays the rule, because the fibers give. On a steel crossarm bolted through a wood pole, the steel side allows a firmer seat, but the wood side still governs. The joint ends where the wood stops complaining, not where the steel spec begins.
Concrete and composite structures reverse the picture entirely. There the embedment hardware carries the load, and the fastener tightens against a material that does not creep. Steel-grade practice therefore applies to the insert or the band, not to wood fibers. Crews who carry one torque habit across all three materials leave two of them either loose or crushed.
Whatever the structure, the record matters more than the number. Marking the nut face with a paint stick after final seating settles the question for the next climb. One glance shows whether the joint has moved since the last visit.
Handled this way, pole line bolts keep their clamp through decades of wet-dry cycling instead of turning into a maintenance list.
Inspection Points That Catch Failures Early
Bolted joints telegraph their problems if someone looks. A rust stain weeping from under a washer means moisture is riding the shank. A pile of wood dust below a lag screw means the thread is chewing its hole with every wind cycle. A square washer sitting proud of crushed fibers means the joint lost its clamp.
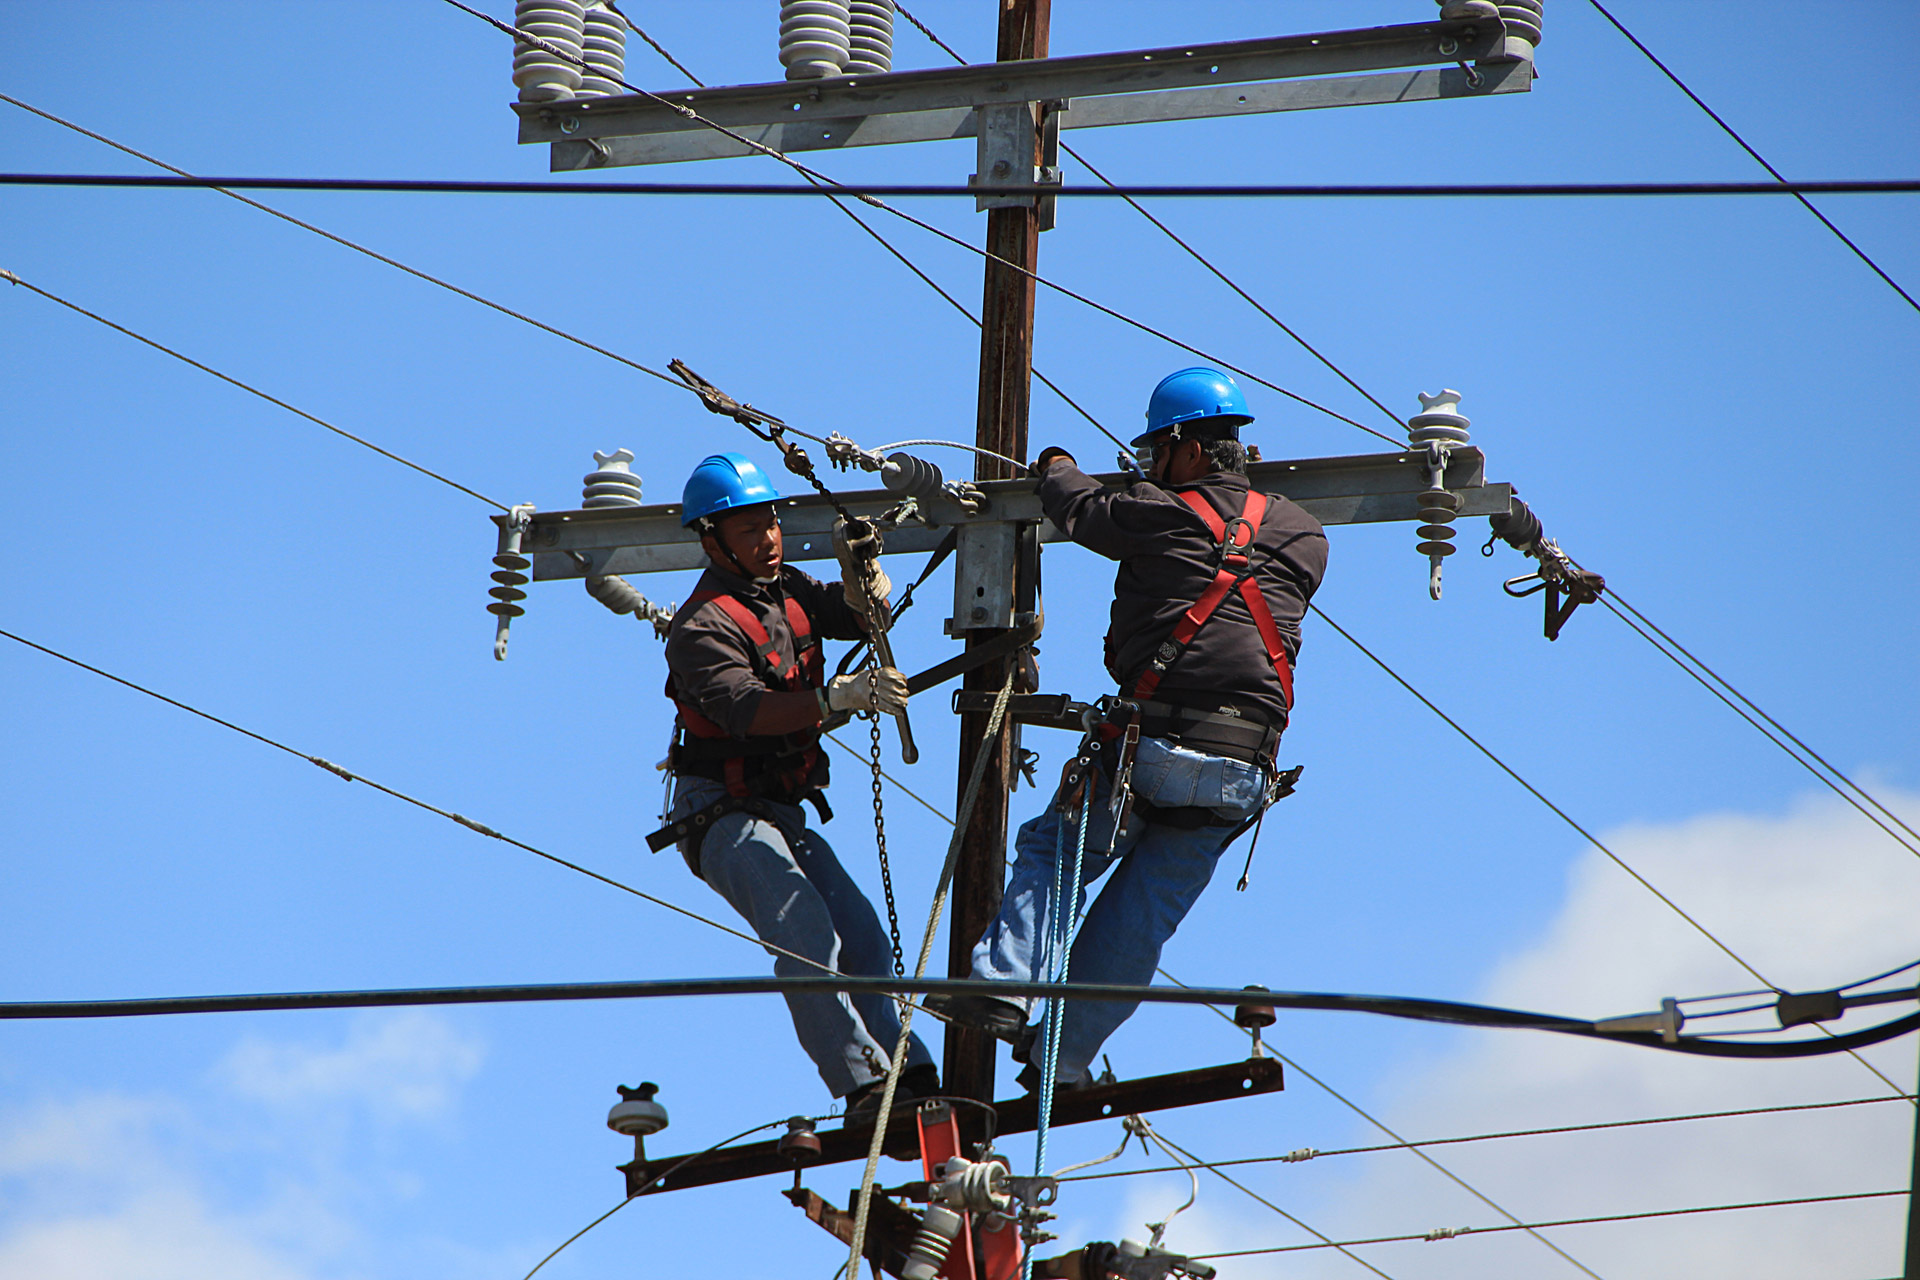
Climbing inspections should include a wrench check on a sample of joints, not a hammer test. The wrench tells you whether the nut still clamps; the hammer only tells you whether the joint rings. Pay attention to the first bolt on any crossarm near the pole face, because that location sees the largest wood movement.
Replace, do not reuse, any bolt that shows a bent shank or a stretched thread. A through bolt that has carried an overload once has already done part of its work, and the next ice map will not announce itself in advance.
Writing a Purchase Specification That Holds
Most bolt disputes trace back to a specification that named a diameter and nothing else. A specification that survives contact with a factory order desk names five things. These are the bolt family, the diameter and length, the dimensional standard, the coating with its reference, and the accessory hardware.
A workable line item reads like this example: square head machine bolt, 5/8 inch by 18 inches, inch-series dimensions, hot-dip galvanized, with square nut and two square washers. Each clause removes one telephone call.
Add the commercial items that affect inspection. Ask for dimension sheets with each shipment, thread protection on long lengths, and packaging that keeps families separated so crews never sort hardware on the pole. Buyers who state those three expect them; buyers who stay silent get whatever the crate happens to contain.
RaxPower has machined and forged this family long enough to know the specification questions before they are asked. The same order desk that fields the confusing inquiries also reviews drawings before production. That review is where most dimensional mismatches get caught, instead of on the pole.
The same discipline covers the rest of the family. A double-arming bolt line item names the diameter, the length between the inner nut faces, and both nut and washer sets. A lag screw line item names the hex head size, the shank length, the thread length, the neoprene-backed washer, and whether a pilot hole chart is expected with the shipment.
Pole line bolts reward the buyer who writes the joint, not just the part. Attachment, structure type, load direction and coating environment all belong in the drawing note or the purchase line. Suppliers can then confirm the family choice instead of guessing it, and the dimension sheets that come back become the inspector's baseline.
Written this way, a purchase order for pole line bolts reads like a set of finished joints waiting to happen. That is exactly what an inspector wants to see on delivery.
عازل مثبت على العمود يمسك بالمواسير الرأسية على مسافة ثابتة من سطح العمود، مما يحمي الكابلات ويحافظ على الفصل عن الموصلات والمعدات الأخرى.
What is the difference between a machine bolt and a lag screw on a pole?
A machine bolt passes through the pole and carries load in shear with a nut and washer on the far side. A lag screw threads into the wood and carries load by withdrawal, so it suits lighter attachments only.
Which diameter of pole line bolts is used on a crossarm?
Crossarm framing normally uses the inch-series machine bolt diameters covered by the overhead line bolt standards, selected from the shear calculation. Keeping to standard sizes preserves nut, washer and spare interchangeability across the fleet.
How tight should a through bolt be on a wood pole?
Snug plus a defined turn, not a steel-grade torque. The goal is full washer contact on sound wood without crushing fibers, followed by a re-check at the first maintenance visit after the wood seasons.
Why do lag screws need a washer with a neoprene backing?
The steel face spreads the clamp load while the neoprene seals the screw hole against water. Keeping moisture out of the shank slows the decay ring that eventually loosens light pole hardware.
What should a pole line bolt specification include?
Bolt family, diameter and length, the inch-series dimensional standard, the coating and its reference, plus nuts and washers. Adding dimension sheets and thread protection to the order removes most follow-up calls.