
Two threaded studs, one slotted body, and a fitting that can shorten a guy wire without anyone touching the strand. That is a turnbuckle, and it is the adjustment point most guy assemblies, bracing systems, and form ties depend on. Used correctly, it gives a crew precise, repeatable tension. Used carelessly, it is the first part to unscrew itself under vibration.
RaxPower builds adjustable turnbuckles with eye, jaw, and hook ends for pole line work, and the questions reaching our order desk are rarely about what the fitting is. They ask how to use a turnbuckle so the adjustment holds: which end goes where, how far to run the threads, and what keeps the setting from creeping. This guide answers those in the order a real installation follows.
What a Turnbuckle Is and Where It Fits
A turnbuckle is an internally threaded sleeve fitted with a stud, eye, hook, or jaw at each end, built to apply tension to rods and wire rope. ASTM F1145, the product standard for welded, cast, and forged turnbuckles, adds one detail that matters in service: the fittings come with or without jam nuts. Rigging standard ASME B30.26 breaks the device into its three working parts: a body, a right-hand threaded end fitting, and a left-hand threaded end fitting.
On a distribution pole, the fitting sits in the guy assembly between the strand termination and the anchor hardware, taking up slack once the rig is made up. The same job repeats in switchgear bracing, catenary and messenger spans, guardrail cable, and formwork ties. Wherever a tension member needs a trim that a bolted clamp cannot give, the guy-attachment family has a turnbuckle in the lineup.
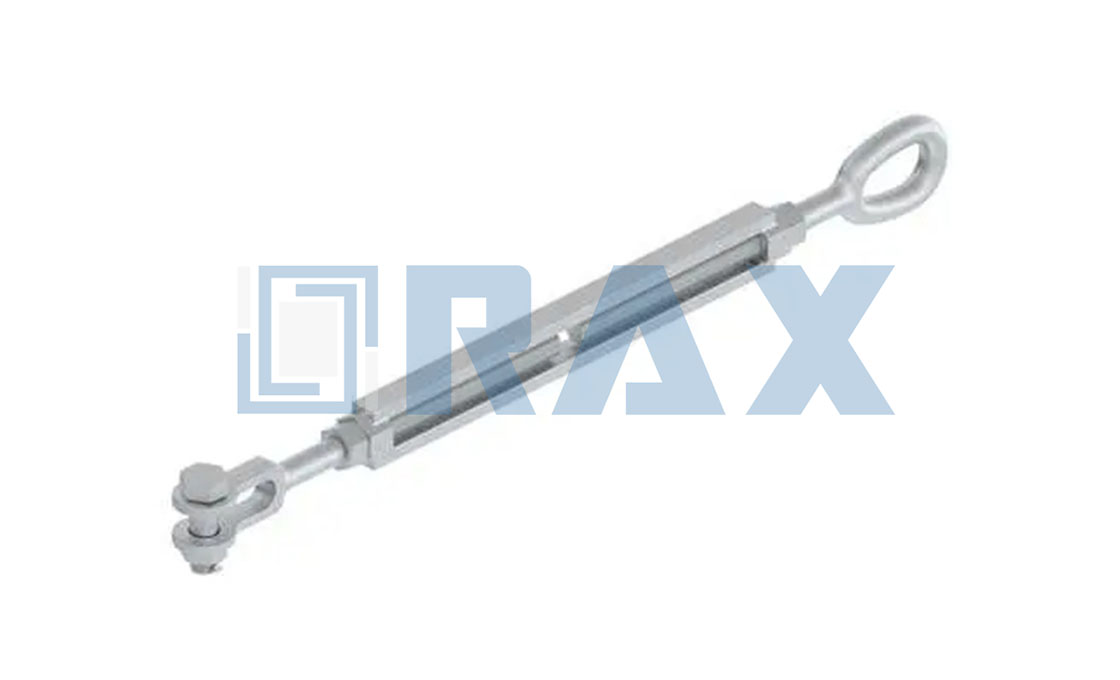
One look at the hardware explains most of this page. The open body shows both studs, the lock nut shows how the setting gets secured, and the two different ends show why fitting choice matters.
How Opposite Threads Move Both Ends at Once
Picture the body as a coupling nut split open so two studs can enter from opposite sides. One stud is cut right-hand, the other left-hand, at the same pitch. Turn the body one way and both studs retract into the frame together; turn it back and both extend.
That symmetry is the whole trick. Because the two studs thread in opposite directions, the body can be spun in place between fixed anchor points without either end fitting having to rotate. Each turn moves both studs by one pitch, so the assembly shortens or lengthens evenly and quickly. It behaves like a machine screw driving into two nuts at once.
Two body styles cover most hardware. Open bodies leave the threads visible, which makes engagement easy to inspect; closed bodies, sometimes called pipe bodies, enclose the studs for a slimmer profile. Catalogs size each unit by thread diameter, which sets strength, and by take-up length, the total travel between fully opened and fully closed.
Choosing End Fittings: Eye, Jaw, or Hook
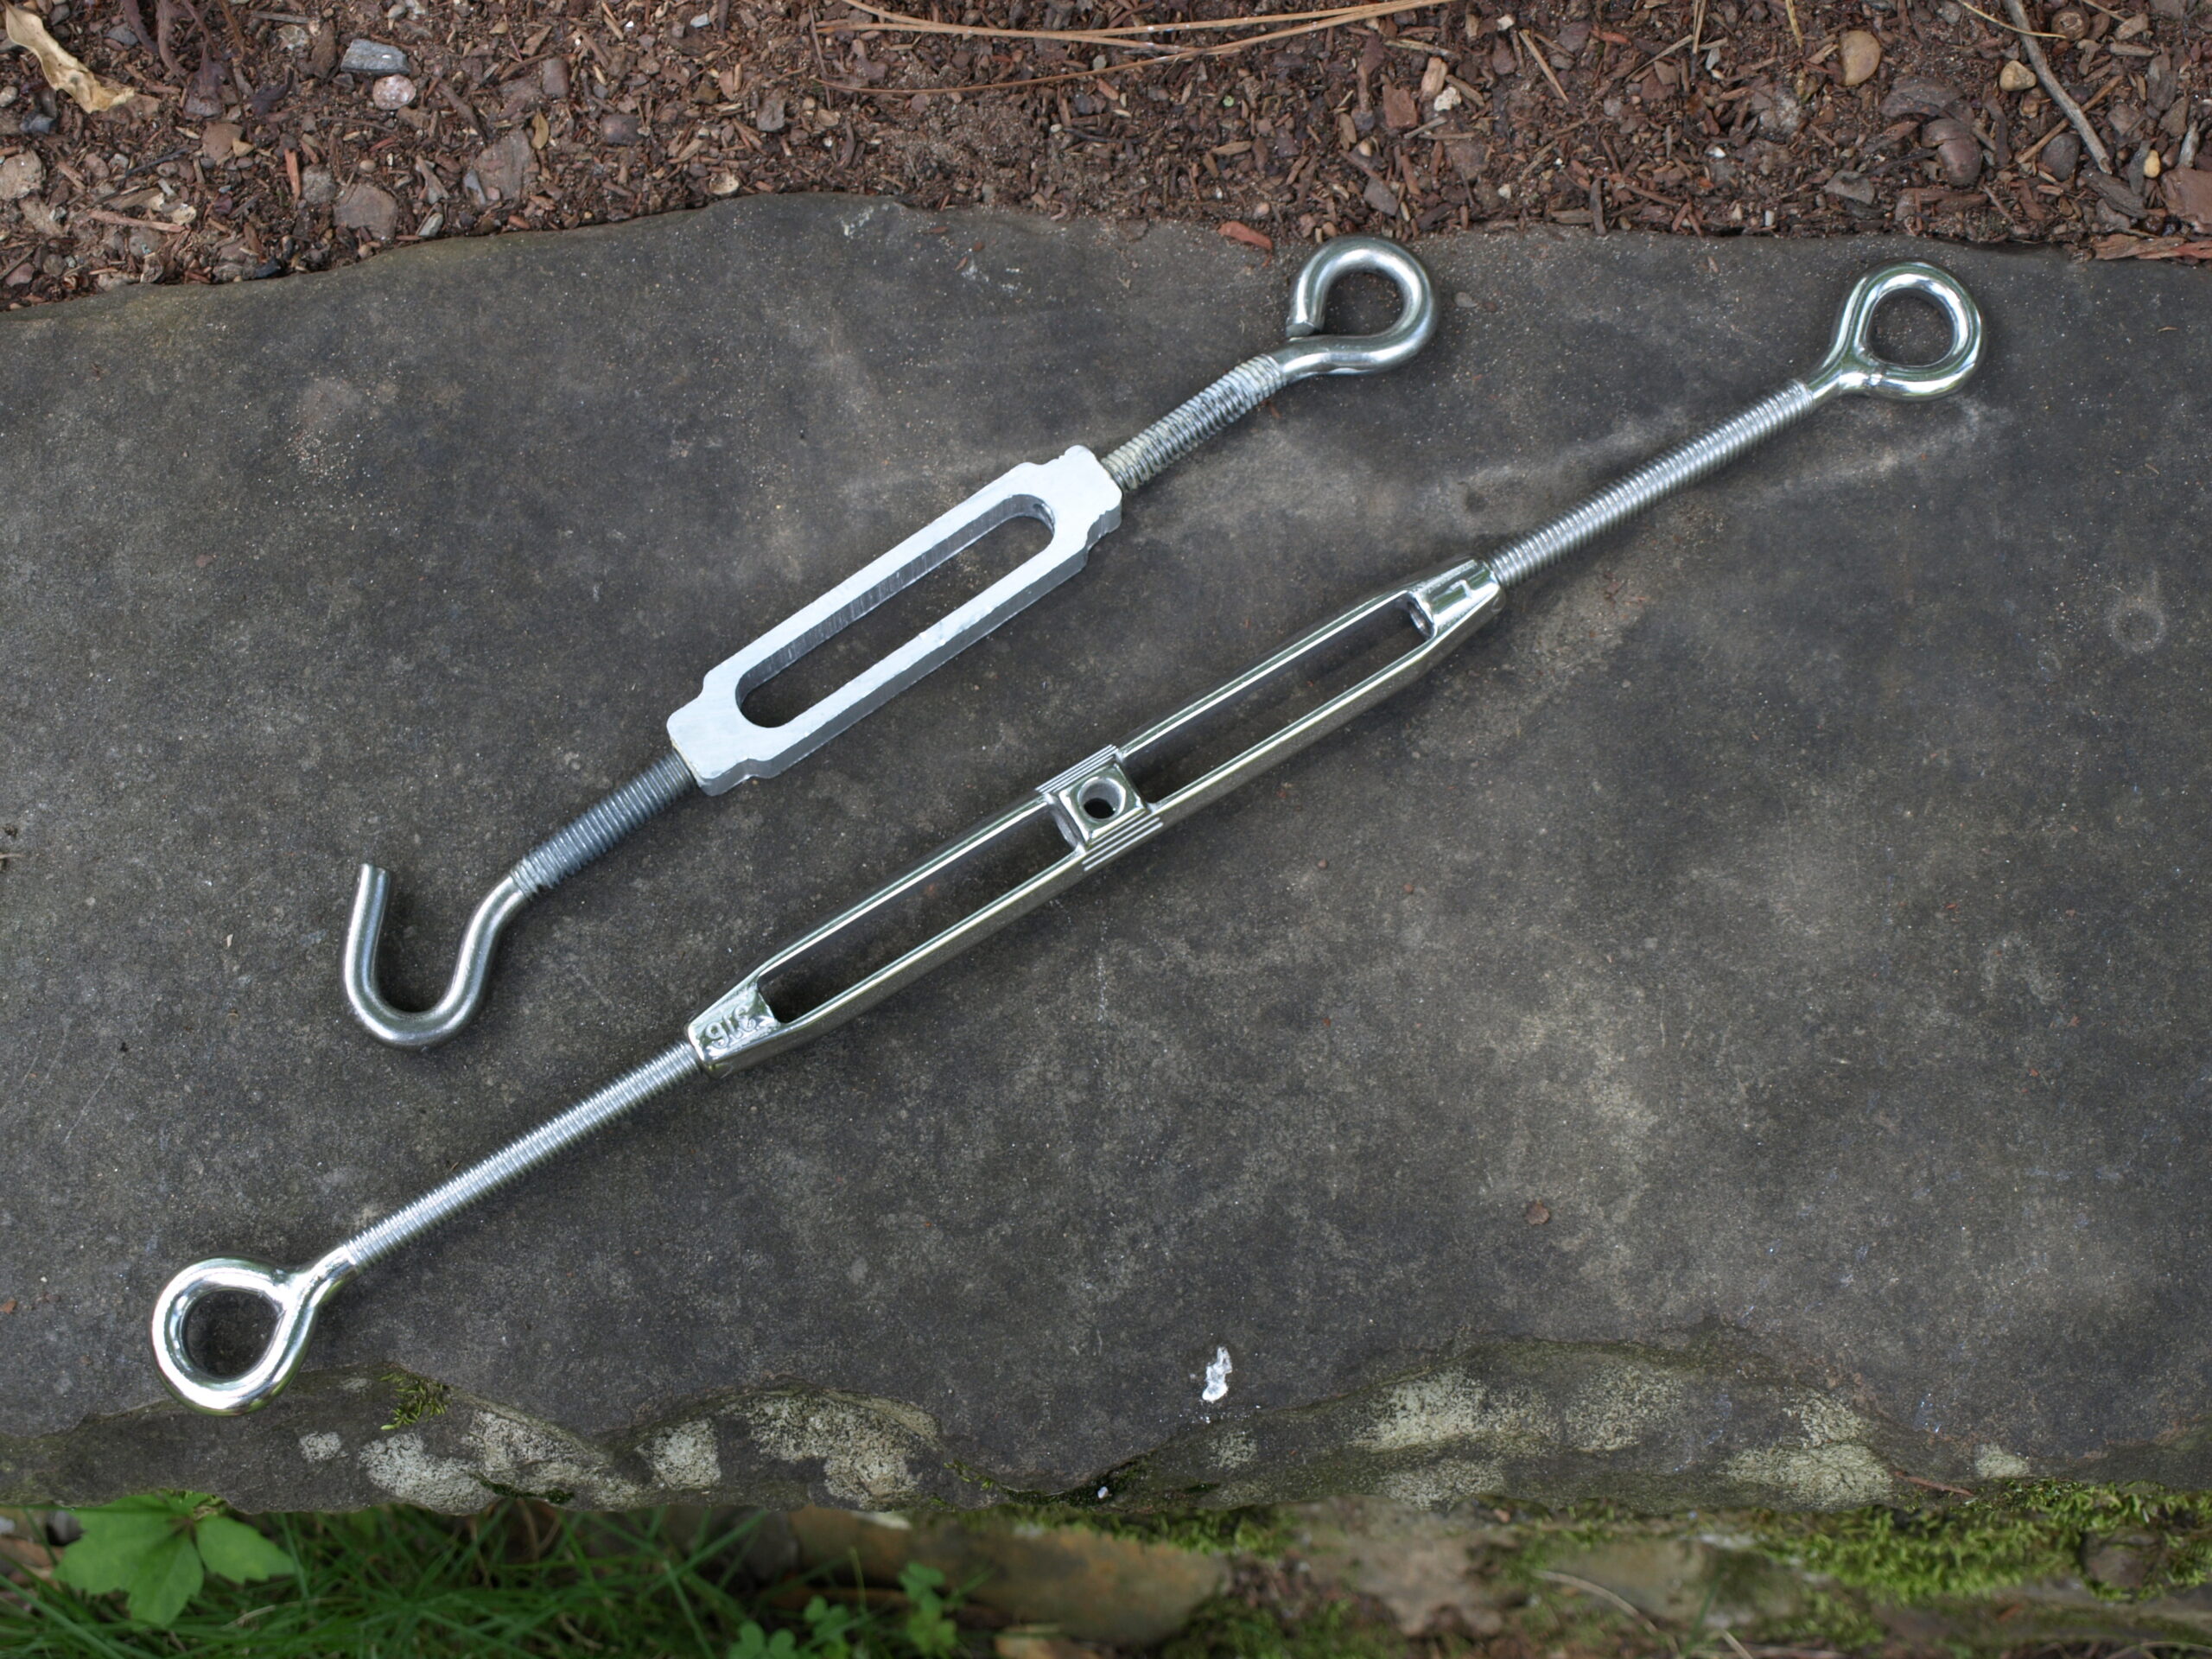
An eye end is a closed loop that connects to a shackle or quick link, which makes it the default choice for permanent tension members. Nothing can release it, and it swivels naturally with the line.
A jaw end is a small clevis: a bolt held by a nut or pin closes over hardware you cannot open, such as an eye bolt or a strand thimble. It turns the turnbuckle into a detachable link in a closed chain of fittings.
A hook end exists for temporary connections only. It speeds setup and teardown, but it must never carry a load that could release if the hook opened, which rules it out of permanent guy service.
The product range behind this guide offers eyes, jaws, or hooks to meet specific requirements, with safe working loads designed around factors of 5:1 or 3:1. Match the fitting to the connection, not the other way round, and size by thread diameter against the working load. A unit adjusted near the middle of its take-up leaves travel in both directions for future retensioning.
Installing a Turnbuckle Step by Step
Learning how to use a turnbuckle takes four moves, and none of them need power tools.
- Open the fitting first. Unscrew both end fittings from the body until they sit at the full take-up length, so the assembly spans its widest gap.
- Connect each end. Drop an eye over a shackle pin, close a jaw around the mating hardware and secure its bolt, or hang a hook only where the connection stays temporary.
- Rotate the body to draw the ends together. Keep turning until the line is snug, then approach final tension in small passes rather than one hard pull.
- Run the lock nuts down against the body once the tension reads right.
On a pole guy, the strand side usually lands on a thimble just below the point covered in the guy hook guide. The strand itself is terminated by the fitting explained in the dead end grip installation guide. The turnbuckle sits in line between them, doing nothing until someone decides the line needs trimming.
Adjustment ranges vary by model. One catalog model, for example, telescopes from 37 to 40 inches for a 3-inch adjustment capability, which is typical of the fine-trim range these fittings are built around.
Tightening Without Binding or Overrunning Threads
Knowing how to use a turnbuckle shows up in the last inch of tightening. Start both studs by hand, the way you would chase any nut onto clean threads, and back off if the first turn fights you. Cross-threading at speed is the classic beginner damage, and it ruins the fitting before it ever carries load.
Turn the body with a wrench or a tommy bar through the frame, and watch both studs emerge evenly from the body ends. Uneven exposure means one side is doing all the moving, which usually points to dirt, damaged threads, or a bent stud. Clean and chase the threads rather than forcing the turn.
By the time the body stops turning freely, stop and look. A turnbuckle adjusted to the last visible thread has no margin left, and a unit loaded with studs barely started has no engagement to hold. Good practice keeps every stud showing thread inside the body and leaves the assembly mid-range so the next season can retension.
Retensioning follows the same discipline. Check new guys after the first month of loading, because strand seats and fittings bed in, then fold the look-over into routine line patrols. Tighten in small passes and watch the studs move together. A fitting that needs constant attention is telling you about a loose thimble or a slipping termination upstream, not about the turnbuckle itself.
Locking the Adjustment Against Vibration
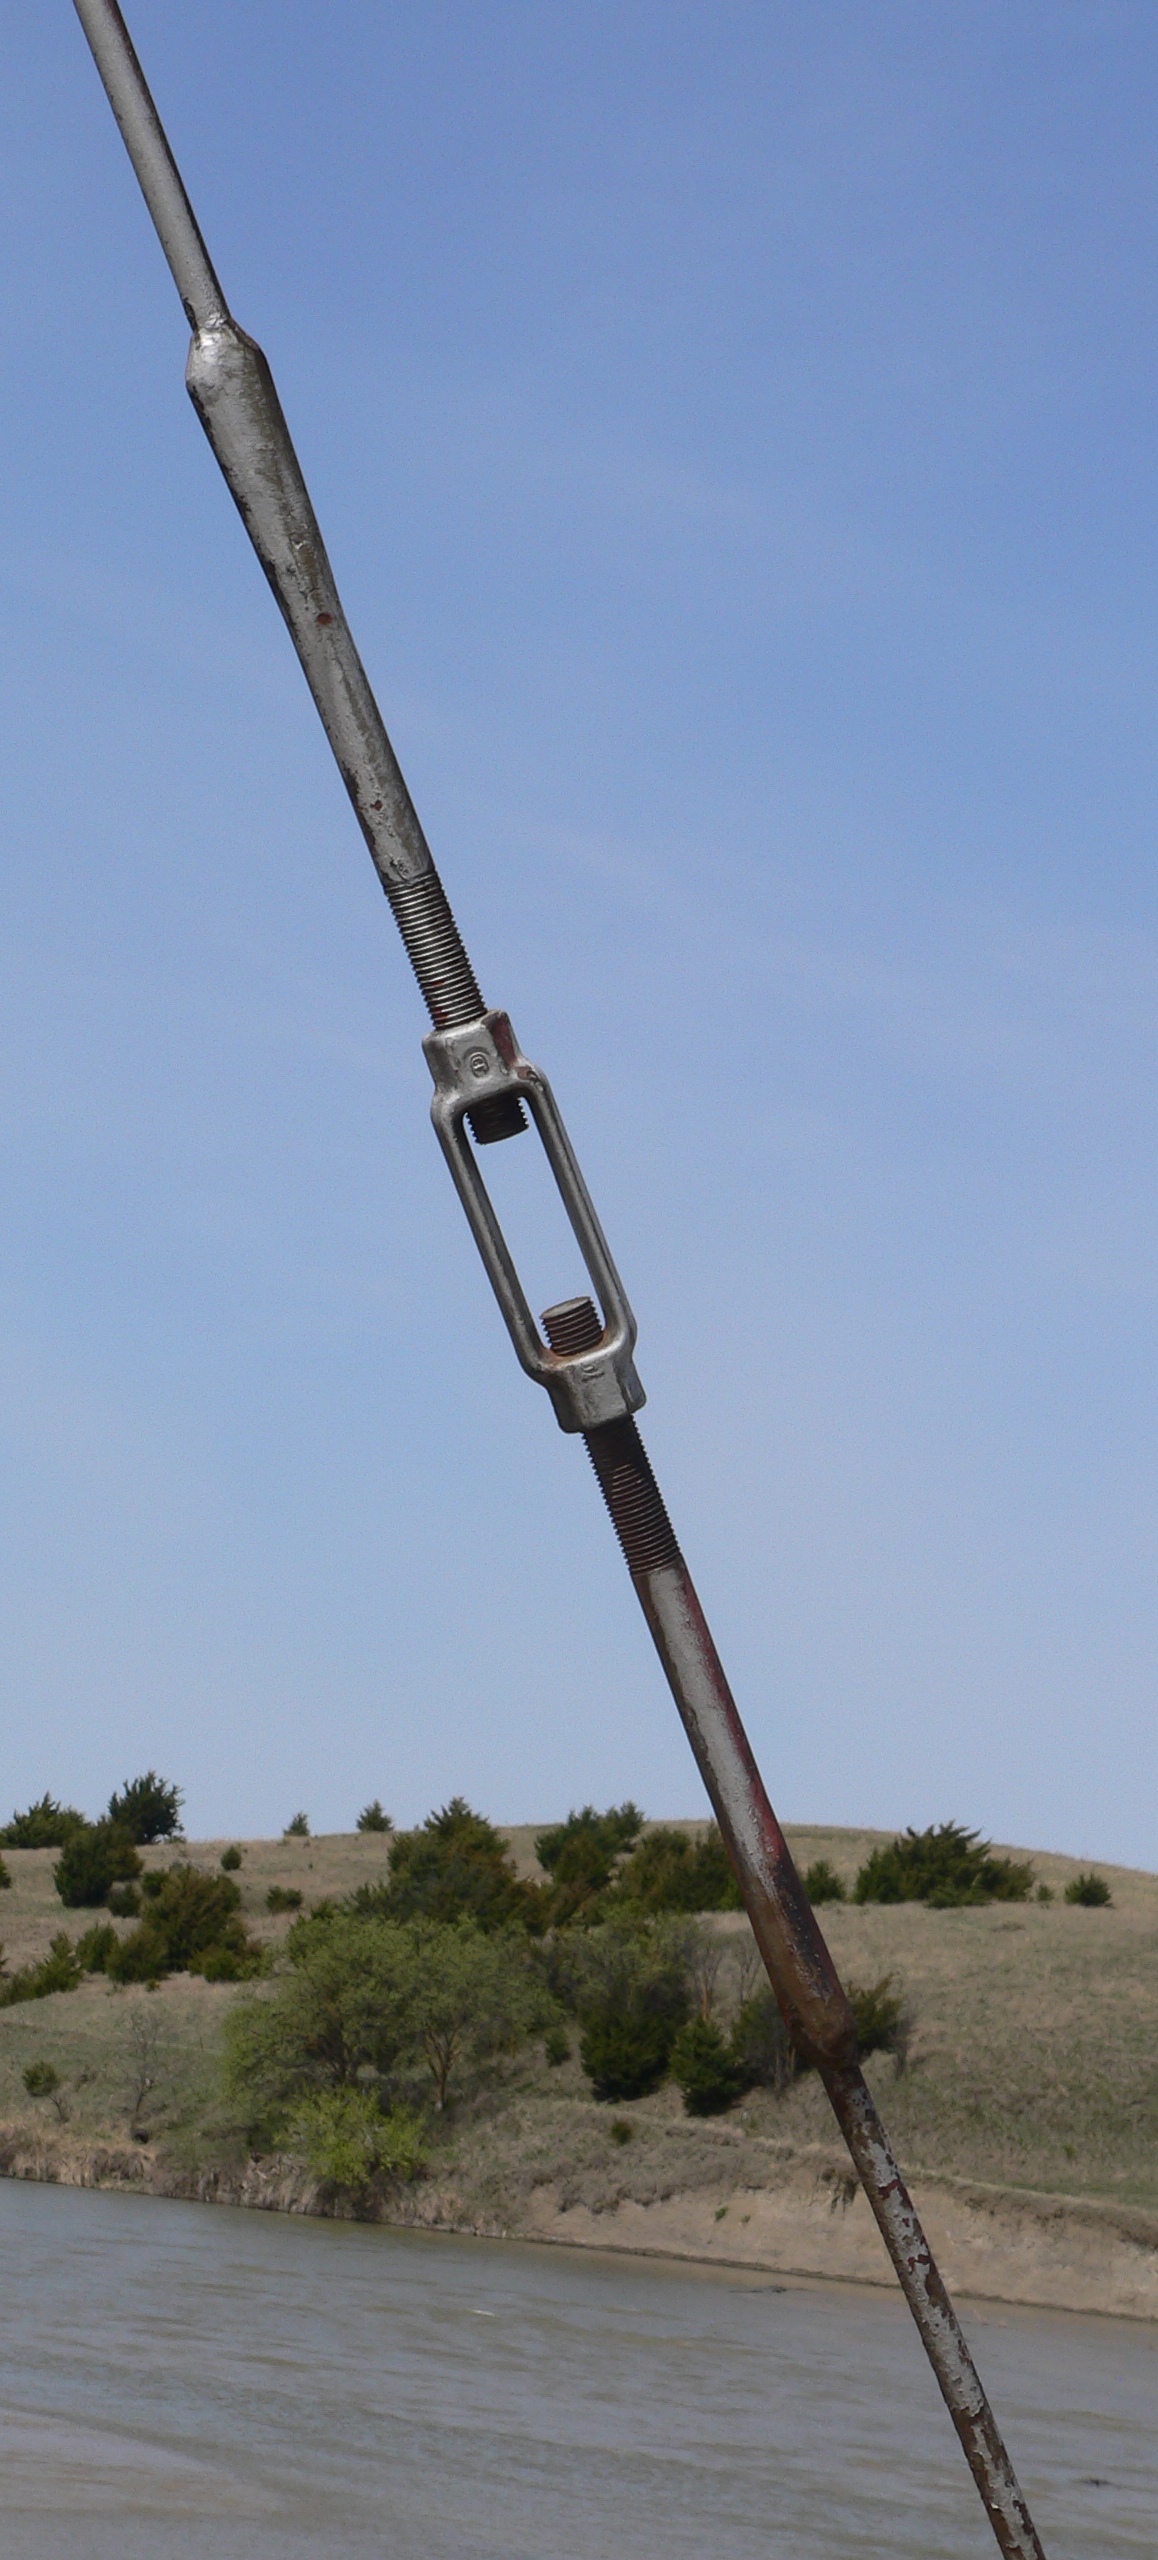
An unlocked turnbuckle is a slow-motion release. Line vibration, temperature swings, and load cycling all work against a bare thread, so every permanent installation ends with a positive lock. A lockoff is what separates knowing how to use a turnbuckle from keeping one in service.
The standard answer is the jam nut. ASTM F1145 lists turnbuckles with and without jam nuts for exactly this reason. Run the nut down against the body and neither part can back off independently. Jaw-end fittings add a second layer: the clamping bolt gets a nut or pin, and that pin is the part inspectors check first.
For runs that see heavy vibration, crews add lock wire through drilled studs or fit safety splints across the body, then re-check the lock after the first load cycle. A lockoff that survives its first week of service usually survives the decade.
Visual Acceptance Checks Before the Load
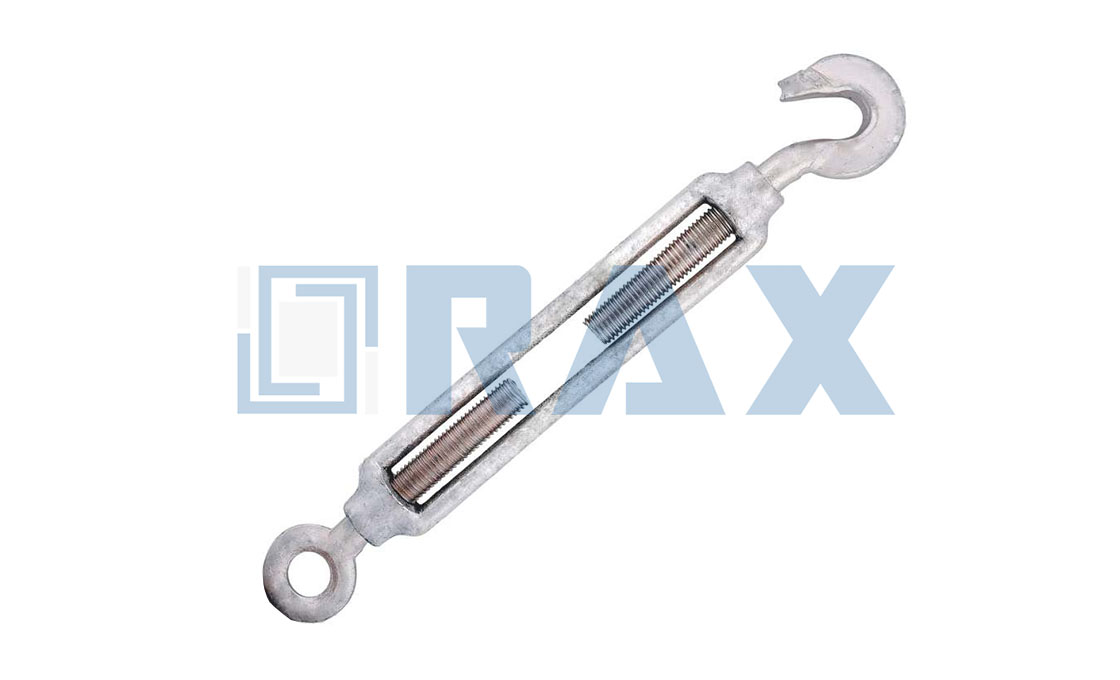
Acceptance closes the loop on how to use a turnbuckle properly, and it is a two-minute walk-around rather than a torque table. Start at the marking. ASME B30.26 requires each turnbuckle to carry the manufacturer's name or trademark and a size or rated load. A missing or illegible mark is itself a removal criterion.
Work through the rest of the fitting next. Both studs should show engaged thread inside the body, and the lock nuts should seat flat against the body ends. Jaw bolts need to be present with their pins secured. The eye and jaw sections should align with the line of pull, because a turnbuckle loaded sideways is a bend waiting to happen. Galvanizing should be intact at the high spots where wear shows first. Pairing hardware deserves the same glance: the thimble seated in an eye should match the strand size, as the spread of guy thimble sizes makes obvious.
Coating condition is part of the same check. The product line ships hot-dip galvanized to ISO 1461, and galvanizing sacrifices itself first at the points that move: thread roots, jaw pins, and joint areas. Surface whitening is normal weathering, but rust bloom at a thread root means the protective layer is spent there and the fitting belongs on the inspection shortlist.
Turnbuckle Safety and Removal From Service
ASME B30.26 gives a removal list that reads like a pre-flight check, and it is the backbone of any turnbuckle inspection routine. Pull the fitting from service for missing or illegible identification. Pull it for heat damage such as weld spatter or arc strikes, for excessive pitting, corrosion, nicks, or gouges, and for bent, twisted, stretched, cracked, or broken load-bearing parts. Excessive thread damage or wear ends the fitting too.
The numeric trigger worth memorizing is dimensional: a 10 percent reduction of the original or catalog dimension at any point takes the fitting out of service. Thread wear is the quiet one. In our experience it is the criterion crews underestimate, because a worn thread still turns smoothly right up until it strips under load.
Working-load discipline closes the loop. A hook end never belongs in a permanent guy, and loads stay within the marked rating with the design factor intact. Repair means replacement, since unauthorized welding or modification is itself grounds for removal.
Key Takeaways on Using a Turnbuckle
- Opposite threads move both studs at once: turn the body, not the fittings.
- Size by thread diameter, working load, and take-up, then adjust in mid-range.
- Hand-start both studs, tighten in small passes, and keep threads engaged.
- Lock with jam nuts or pins, and re-check after the first load cycle.
RaxPower forms and galvanizes turnbuckles and matching guy hardware in eye, jaw, and hook styles, so the checks above can be run against hardware one factory controls end to end.
Часто задаваемые вопросы
Как талреп увеличивает натяжение?
Корпус имеет правую резьбу на одном конце и левую резьбу на другом. Вращение корпуса одновременно закручивает обе шпильки внутрь, укорачивая конструкцию и увеличивая натяжение без поворота концевых соединительных элементов.
В какую сторону нужно вращать талреп, чтобы его затянуть?
Поверните корпус так, чтобы он вошёл в резьбу на обоих шпильках одновременно; сборка укорачивается, и натяжение растёт. Измените направление, чтобы удлинить сборку и ослабить трос.
Как не дать талрепу самоотвинчиваться?
Затяните контргайки, также называемые стопорящими гайками, плотно к обоим торцам корпуса и зафиксируйте каждый распорный болт с помощью штифта или шплинта. После первого цикла нагрузки повторно проверьте затяжку стопорных гаек.
Насколько глубоко должна заходить резьба на тяговом винте?
Запланируйте работу так, чтобы фитинг регулировался в середине диапазона компенсации натяжения. Обе шпильки должны иметь задействованную резьбу внутри корпуса в рабочем положении, с оставленным запасом хода для будущей подтяжки.
Can a hook-end turnbuckle hold a guy wire permanently?
No. Hook ends are built for temporary connections that come off quickly. A permanent guy takes eye or jaw ends, which cannot release if the load shifts or vibrates.